How to Automatically Clean Multiple User Accounts in Windows with CCleaner

CCleaner is a free tool that can help keep your computer clean and running smoothly. Instead of manually running it, you can have it run automatically for all users.
Keeping your computer in good shape is important to make it perform well. Clearing your browser history and cookies, uninstalling software you’re not using, and finding and deleting duplicate files are just a few of the things you can do to improve the performance of your computer. Keeping your computer secure is also important, and securely wiping the free space on your computer can help with that.
CCleaner is a free tool that can help accomplish these tasks and more. If you’re using a computer that you share with others, you can have CCleaner automatically run and clean each account when users log in to Windows. We’ll show you how.
Before setting up CCleaner to run automatically, you should open CCleaner and choose what you want to clean. Then, when CCleaner automatically starts, it will clean what you set it to clean.
We’re going to use the Registry Editor to have CCleaner automatically clean your PC when you log in to Windows.
You should also make a System Restore point before continuing so, if something goes wrong, you can always roll back.
How to Get the Path to the CCleaner Program File
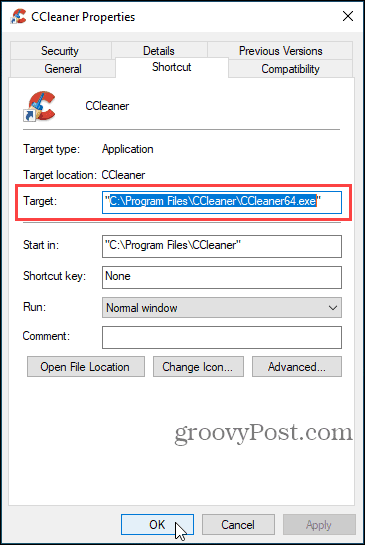
Before modifying the registry, you need to get the CCleaner program (.exe) file path.
To do this, right-click on the CCleaner icon on the desktop. Then, select Properties.


Select the path in the Target box without the quotes and copy it.


How to Open the Registry Editor
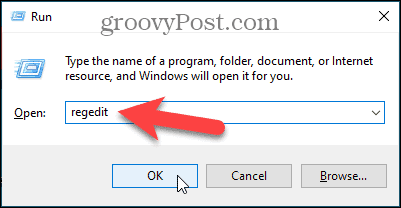
To open the Registry Editor, press Windows key + R to open the Run dialog box. Then, type: regedit into the Open box and click OK.


If the User Account Control dialog displays, click Yes to continue.


How to Find the Registry Key and Create a New String Value
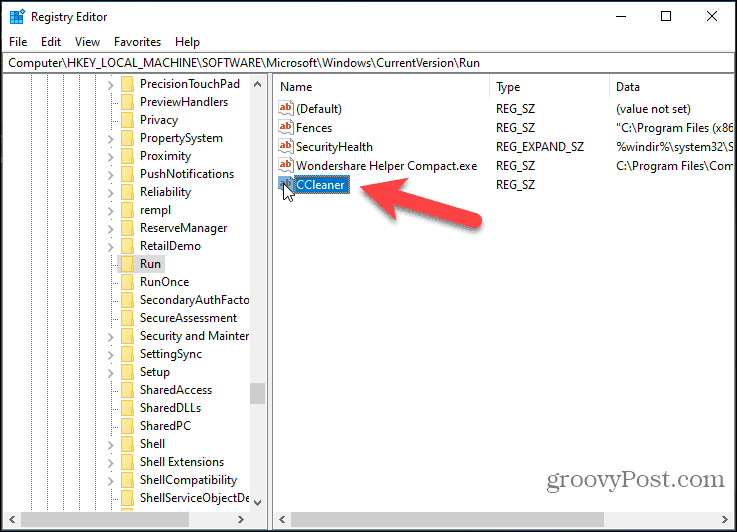
In the Registry Editor, browse to the following registry key in the left pane:
HKEY_LOCAL_MACHINE\SOFTWARE\Microsoft\Windows\CurrentVersion\Run
Then, right-click in the right pane and go to New > String Value.


Name the new entry CCleaner.


How to Assign the CCleaner Path to the Registry Entry
Now we’re going to use the path you copied from the CCleaner shortcut as part of the value of the new CCleaner entry.
Double-click on the new CCleaner entry you just created.
In the Value data box, paste the path you copied. Then, type a space and type: /auto.
Click OK.


Go to File > Exit to close the Registry Editor.


The next time any user logs into Windows, CCleaner will automatically start and clean everything according to the options you set in the program.


Once CCleaner is done cleaning, it closes automatically.
For more on this valuable and free tool, check out how to speed up your PC using CCleaner. Or, if you travel a lot, make sure to have the portable version ready to go!
Leave a Reply
Leave a Reply


