How to Create Smart Albums in Photos in macOS Monterey

Smart Albums are a terrific feature in the Photos app in macOS Monterey. Here’s a brief overview and how to use the feature with ease.
Do you struggle to keep track of your photos? If you’re using the built-in Photos app in macOS Monterey, you have the tools to solve the problem.
One of the essential tools that the Photos app offers is the ability to create Smart Albums. When you create a Smart Album, Photos will automatically place any photos within it that match your criteria.
As new photos are created or stored on your Mac, macOS will automatically move them into different Smart Albums. If you want to know how to create Smart Albums on macOS, here’s what you’ll need to do.
How to Create Smart Albums on Mac
To create and maintain Smart Albums on Mac:
- Open the Photos app on your computer.
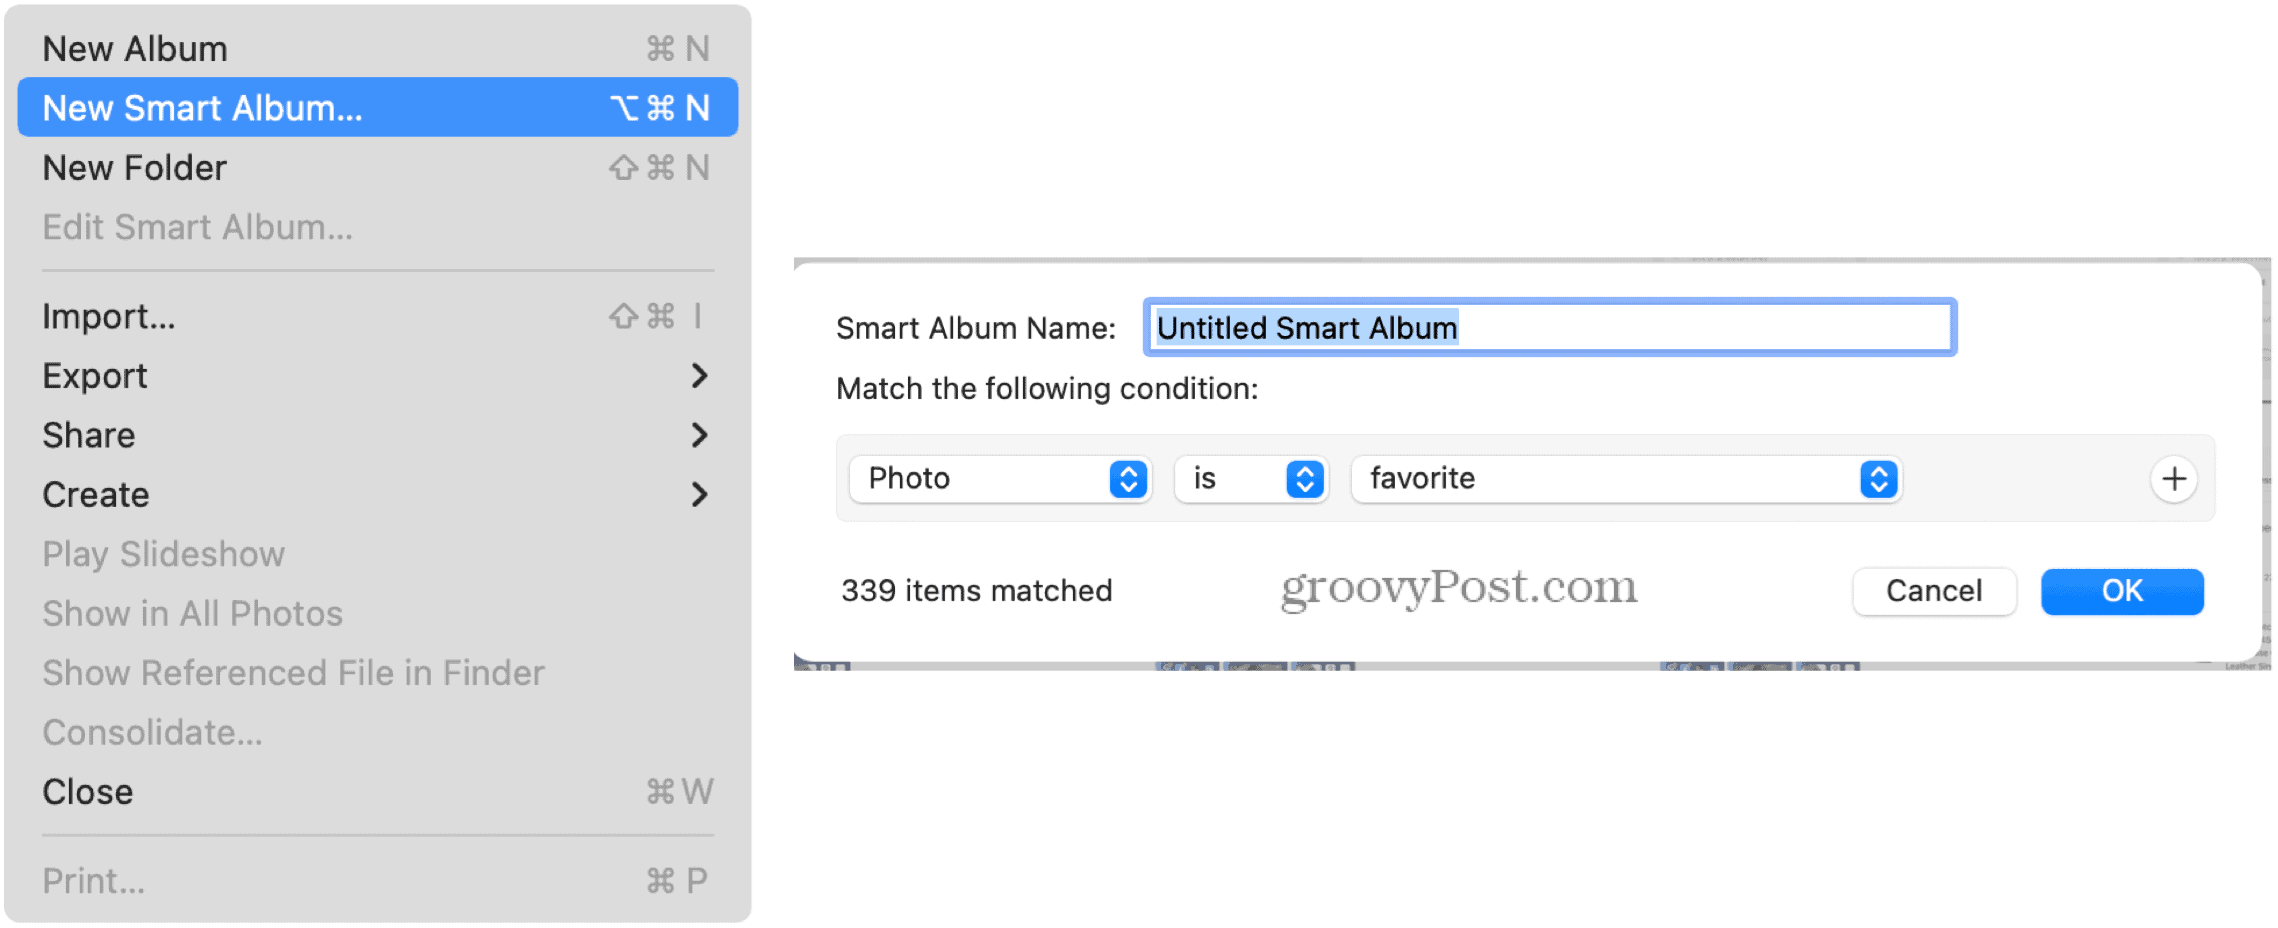
- Choose File.
- Select New Smart Album.
- Add a name in the Smart Album Name box to indicate the types of images that reside here. For example, “Vacation 2021.”


Setting Conditions for Smart Albums
Next, you’re going to create a condition (or conditions) used in the Smart Album. Apple has packed a lot of options here, including those mentioned below. These include:
- Categories: When creating a Smart Album, you should first establish a category for which to search. There are different built-in categories to choose from, including Photo, Keyword, Title, and Text.
- Defining Relationship: Next, take categories further by adding a modifier, sometimes called a defining relationship. The options available are based on the category you selected initially. For example, if you decided Person as your category, you might want to include (or not include) photos with certain people. In another example, if the category is Photo, the defining relationship might be Selfie, Video, Favorite, or RAW.
- Setting a Criteria for the Condition: In the third pop-up menu or field, you can further craft the Smart Album. Perhaps, for example, you only want images taken in 2021.
- Adding and Removing Conditions: There are “+” and “-” buttons next to every condition. Add and remove based on your preferences.
- All or Some?: Finally, with your Smart Album, note whether every condition must be met for a photo’s inclusion or just one of them. These are called “all” or “all.” For example, a Smart Album of Vacation photos that includes Jennifer taken in 2021 consists of three conditions. If all three conditions are a requirement, then the Smart Album will be much more selective. However, if reaching only one condition is acceptable, your results will be much broader.
When you’re finished, click OK to save your choice.
An Example
In the following example, we’ve created a smart album for photos from 2021 that include the keyword “dog.”


In another, we’ve gathered every image captured in Portrait mode on a compatible iPhone:


Edit Smart Albums
You can adjust the conditions for Photos app Smart Albums at any time. To do so:
- Open the Photos app on your computer.
- Right-click on the Smart Album on the left side of the app.
- Choose Edit Smart Album.
- Adjust the conditions based on your preferences.
- Click OK.
In the following example, we’re still collecting images captured in Portrait mode. However, now the Smart Album only includes pictures taken in 2021:


Other Smart Albums Solutions
Over time, you might want to adjust other settings of your Smart Albums even further. For example, perhaps you want to duplicate one, add new conditions, or rename or delete it.
Rename a Smart Album
To rename an existing album in the Photos app on Mac:
- Open the Photos app on your computer.
- Right-click on the Smart Album on the left side of the app.
- Select Rename Smart Album.
- Adjust the name, then hit Return on your keyboard.


Duplicate
To copy an album:
- Open the Photos app on your computer.
- Right-click on the Smart Album on the left side of the app.
- Select Duplicate Smart Album.
- Next, rename the copied album, then adjust the conditions as needed.


Delete
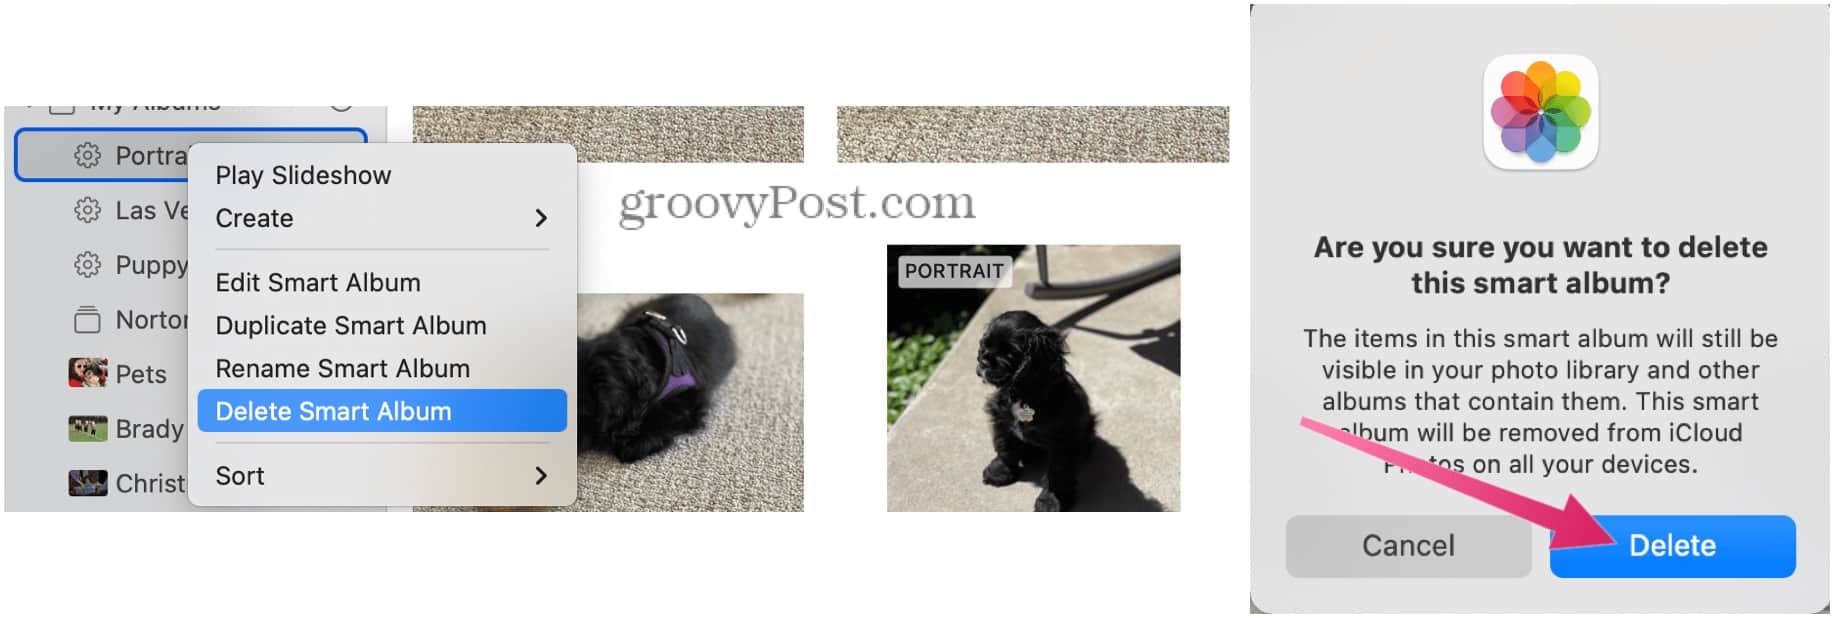
To remove albums in the Photo app:
- Open the Photos app on your computer.
- Right-click on the Smart Album on the left side of the app.
- Select Delete Smart Album.
- Confirm by clicking Delete in the box.


Note: Deleting a smart album does not remove the images from the Photos app.
What About iPhone and iPad?
If you’re using iCloud Photos, all of your images and videos sync across your Apple devices. But, unfortunately, when you create Smart Albums on Mac, they don’t carry over to your other devices.
Smart Albums are a great way to have a living and breathing set of photos that change based on the conditions you set. We’ll be covering more Photos app features in future posts. Stay tuned!
Leave a Reply
Leave a Reply


