How to Launch a New Website in 6 Simple Steps

In this article we’ll walk you through choosing a good host, installing a WordPress site, and how to make sure your website starts getting traffic (and earning money from it).
Launching a new website is always exciting. Maybe you have some ideas you’d like to offer to the world in the form of a blog. Or maybe you’re hoping to open a new online storefront. Regardless of your reasons for launching a website, the process is generally the same across the board.
In this article, you’ll learn the entire process of launching a new website. We’ll walk you through choosing a good host, installing and customizing a site using a platform like WordPress, and how to make sure your website starts getting traffic (and earning money from it).
Step 1: Find Your Domain
Before you can even think of launching a website, you’ll need to find a good website URL. The URL is essentially the “domain” of your site. For example, Groovypost’s domain is “Groovypost.com”.
There are lots of online resources you can use to find your perfect domain name and check if it’s available. The easiest thing to do is use the domain search tools on the most popular domain registration services.
The most popular sites for buying your domain include (all links below go to their domain search page):
- Cloudflare.com
- Domain.com
- Bluehost.com
- Namecheap.com
- GoDaddy.com
- HostGator.com
- DreamHost.com
- Shopify.com
In addition to these, there are also online services that provide more flexible tools to find alternative domain names if the one you want isn’t available.
- InstantDomainSearch: Shows availability as well as alternative domain variations. Includes the estimated cost to buy an existing domain.
- Name.com: Let you know if the domain is available, as well as alternative premium domains and associated costs.
InstantDomainSearch is especially useful because it attempts to provide variable spellings to your desired domains. Many of those under the Generator field are available and may suit your needs perfectly.

Most of these search tools also let you purchase the domain directly.
Step 2: Find a Web Hosting Plan
Additionally, many of the domain registration services above also offer a web hosting plan. Often, you can actually save money by buying your domain and website hosting package in one place. For example, with the groovyPost discount at Bluehost, you can get a free domain plus hosting for a discount.
The important thing to remember is that at this stage, it’s critical that you purchase a domain name and a web hosting plan.
Once you have both, make sure to log into your domain account and change the nameservers for your domain to point to your web hosting nameservers.

You can get these nameservers in the control panel in your web hosting account.
Step 3: Install and Customize a Website Platform
Once your domain is pointed to your web host, you’ll see a blank page (or a web host advertisement page) when you type your new domain into your web browser. This is because you currently don’t have any files stored on your host to display any web pages.
If you went into the file manager in your web host account and browse to the public_html folder, you either see no files or default files.
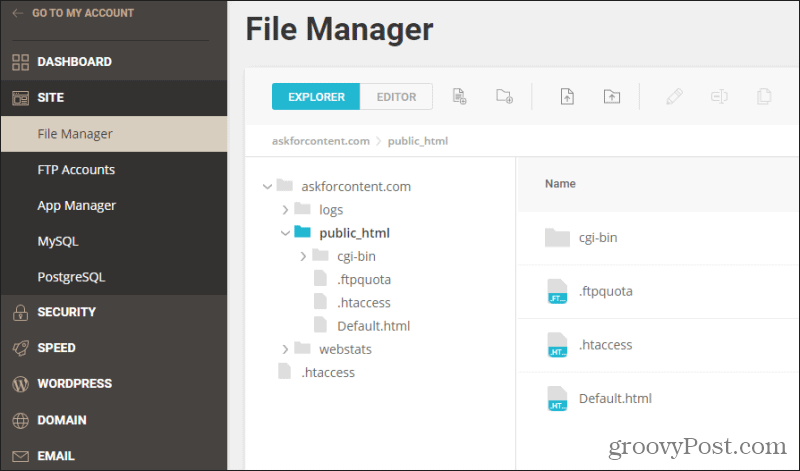
If you wanted to, you could use the File Manager on your host to start creating HTML or PHP files and build your web pages manually.
Of course, this would take a lot of work, and a lot of web design knowledge. It’s much smarter (and faster) to make use of web design platforms and themes that experts have already created.
Preferably, your web host provides an instant WordPress installation kit. This is usually a one-click solution that’ll install the WordPress platform into your public_html directory.

Even if it doesn’t, manually installing WordPress on your host is actually very easy.
- Download the WordPress installation package.
- Unzip the ZIP file and upload all contents of the inner wordpress folder to your public_html folder on your web host account. This should include wp-admin, wp-content, and wp-includes folders, as well as a variety of files.
- Use the MySQL or phpMyAdmin tool in your host control panel to create a new database. You can give it any name; just note the database name, admin ID, and password.
- Using your web host’s file manager app, edit the wp-config-sample.php file with the database name, ID, and password. Save the file as wp-config.php.
- Run the WordPress installation on your domain by opening a browser and typing in https://your-domain.com/wp-admin/install.php. Replace “your-domain.com” with the name of your domain.
- Step through the WordPress installation wizard.
Once you’re done, you’re ready to start using WordPress on your site! Just remember to note your chosen WordPress Username and Password so you can log in later.
Step 4: Create Your Content
To start creating content with the WordPress platform, type https://your-domain.com/wp-admin/ into your web browser and log in using your WordPress Username and Password.
The first thing you should do to add some style to your website is to pick a theme. In WordPress, you can do this by selecting Appearance from the left menu and selecting Themes.

You can install any of the default themes displayed, or select Add New at the top to search for more available themes. Once you install a theme, you’ll notice your live website will adopt the style of that new theme.
You can also purchase premium themes that’ll really add a more professional style to your site. There are themes available for profile websites, blogs, online stores, and more.
Start adding new posts to your site by selecting Blog Posts from the left menu, and selecting Add New. You can also create static pages (for something like an online store) by selecting Pages from the left menu, and select Add New.
Create Content Faster
The hardest part of building a website is filling it with high-quality content. It can be very labor-intensive to write everything yourself. An alternative, if you have the funds for it, is to hire writers to create the content for you.
Some of the most popular online boards where you can find freelance writers for hire include:
- ClearVoice
- LinkedIn Profinder
- Scripted
- Problogger Jobs Board
- Freelance Writing
- WriterAccess
- Constant Content
- SimplyHired
- Upwork
- Freelancer
A word of advice: there are a lot of freelancers available, but it’s not always easy to find very high-quality writers. Many freelancers on these boards are not native English speakers, and as such, their grammar isn’t always perfect. You’ll get what you pay for, so offer fair pay and demand to see published samples of online work.
Website content typically costs roughly $60 up to $200 for a 1,000-word page, depending on the experience and skill level of the writer.
Step 5: Install Backend Apps to Monitor Traffic
Once you have your site up and running, there are a number of important plug-ins you should also install on your WordPress platform.
You can install plug-ins by selecting Plugins from the left menu and selecting Add New. There’s a search field at the top you can use to find your required plugin.

The most important plugins include:
- W3 Total Cache: This will improve your site’s performance by doing things like caching pages on your visitor’s browsers so elements of your page load faster as they navigate the site.
- CDN Network: As your traffic grows, a CDN service like Stackpath or Cloudflare will serve images from servers located close to your visitors’ locations, which will speed up your site speed and reduce the load on your web host server.
- Yoast SEO: This plugin will automatically take care of important SEO elements of your site like creating a sitemap, managing meta tags, and improving your permalinks and RSS feed.
- Wordfence Firewall: Firewall plugins protect you from hackers by blocking brute-force login attempts, and blacklisting known malicious IPs.
- UpdraftPlus: Performs automatic backups of your website to any cloud account, like Google Drive. If you’re ever hacked, a site backup is a lifesaver.
You’ll also want to make sure you install Google Analytics so that you can monitor your website traffic.
Installing Google Analytics is as simple as creating a new property in your Google Analytics account (you’ll need a Google account to do this), and then copy the website tracking code into the header.php file on your website, under the <HEAD> tag.

You can find this code in Google Analytics by opening the Admin section and selecting Tracking Info under the Property section.
Step 6: Monetize Your Traffic
Once you have your site up and running with plenty of content, there are several ways to monetize the site.
Bloggers and other content creators usually turn to Google Adsense for the easiest solution. You can create ads of any size or dimension you need and place it into your site by copying the ad code found in your Google Adsense account for that ad.
You’ll see the embed icon to the right of the list of ads you’ve created, under Ads, Overview.

You can paste this code anywhere on the page where you want the ad to appear.
There are lots of other ad networks to choose from as an alternative to Google Adsense.
If you’re launching an online store, then you won’t have to worry about ads because you’ll make money through the sale of your products.
Your Own Online Presence
Launching a new website used to be something only technically savvy people could do. But now, each step of the process is easy enough for almost anyone to do. Just take each step as one project and work your way through it.
Before you know it, you’ll have a fully functional website that you can share with all of your friends and family.