How to Change Mouse Sensitivity on Windows

Need to adjust how quickly your mouse cursor moves across your screen on a Windows PC? You’ll need to adjust your mouse sensitivity using this guide.
Mouse sensitivity is the speed and responsiveness of your mouse or trackpad. When you move your mouse cursor, how quickly does it move, and is it suitable?
You may want to increase your mouse sensitivity if you need to make smaller, more careful adjustments to your cursor. For example, if you’re gaming, you may want a quick mouse cursor to quickly change targets. Likewise, if a mouse is too slow, you can adjust the sensitivity to improve the situation.
If you’re having a problem with a slow (or fast) mouse, you can change the mouse sensitivity on a Windows PC using the steps below.
How to Change Mouse Sensitivity on Windows 11 via Settings
To adjust the mouse sensitivity on a Windows 11 PC, use the following steps:
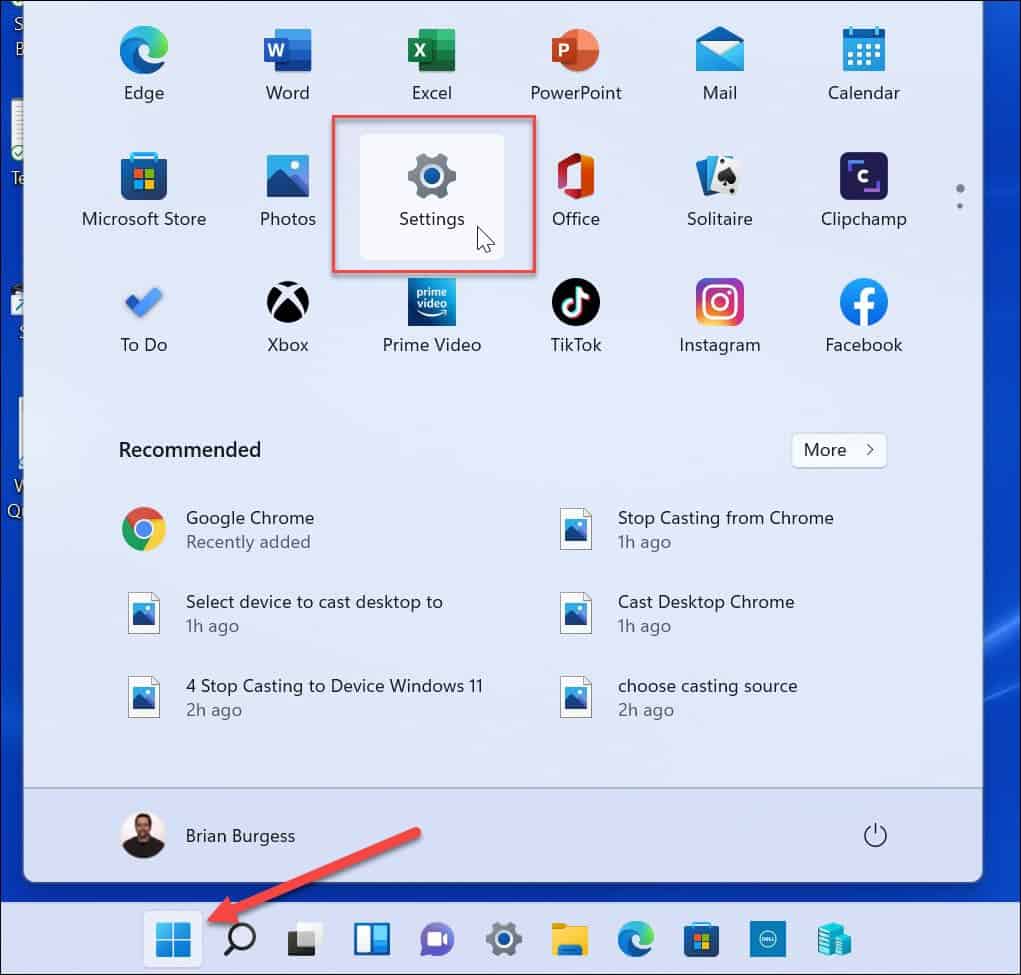
- Open the Start menu and select the Settings option.

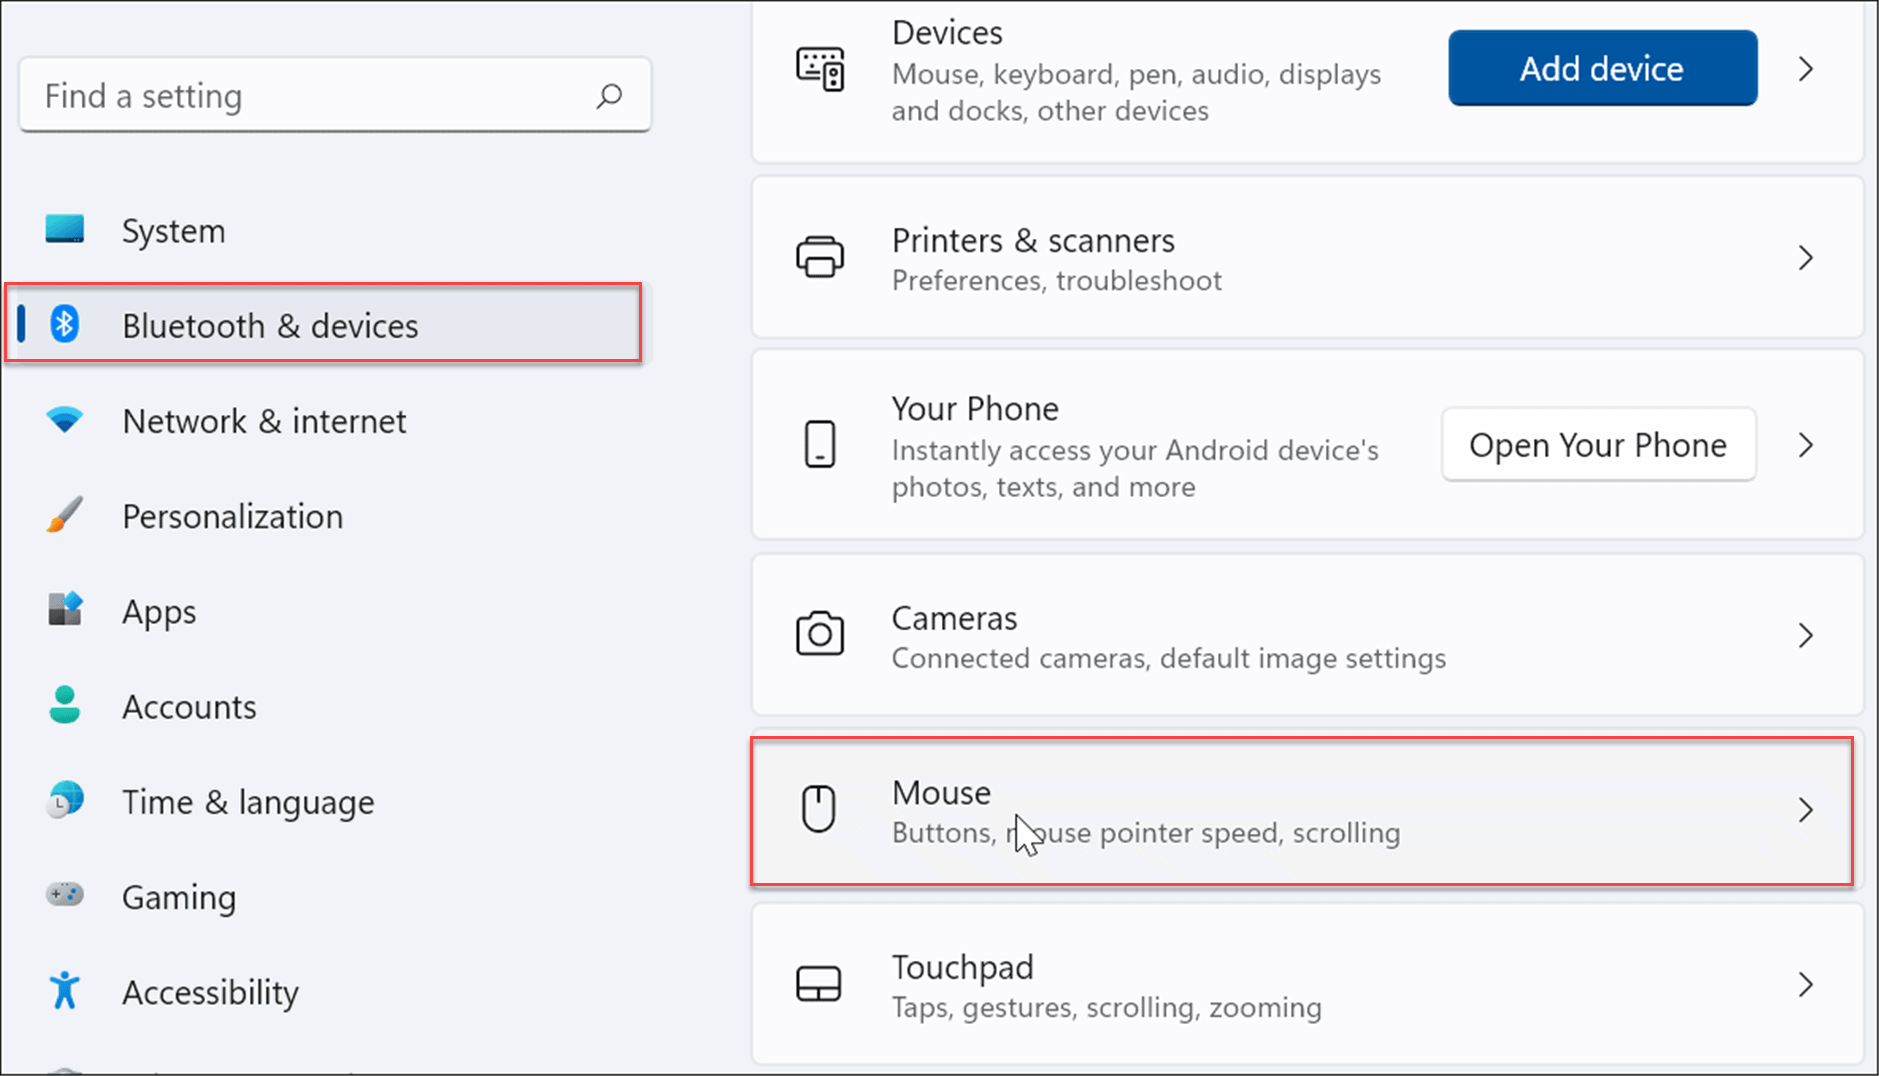
- When Settings opens, select Bluetooth & devices from the list on the left.
- On the right, scroll through and select Mouse.

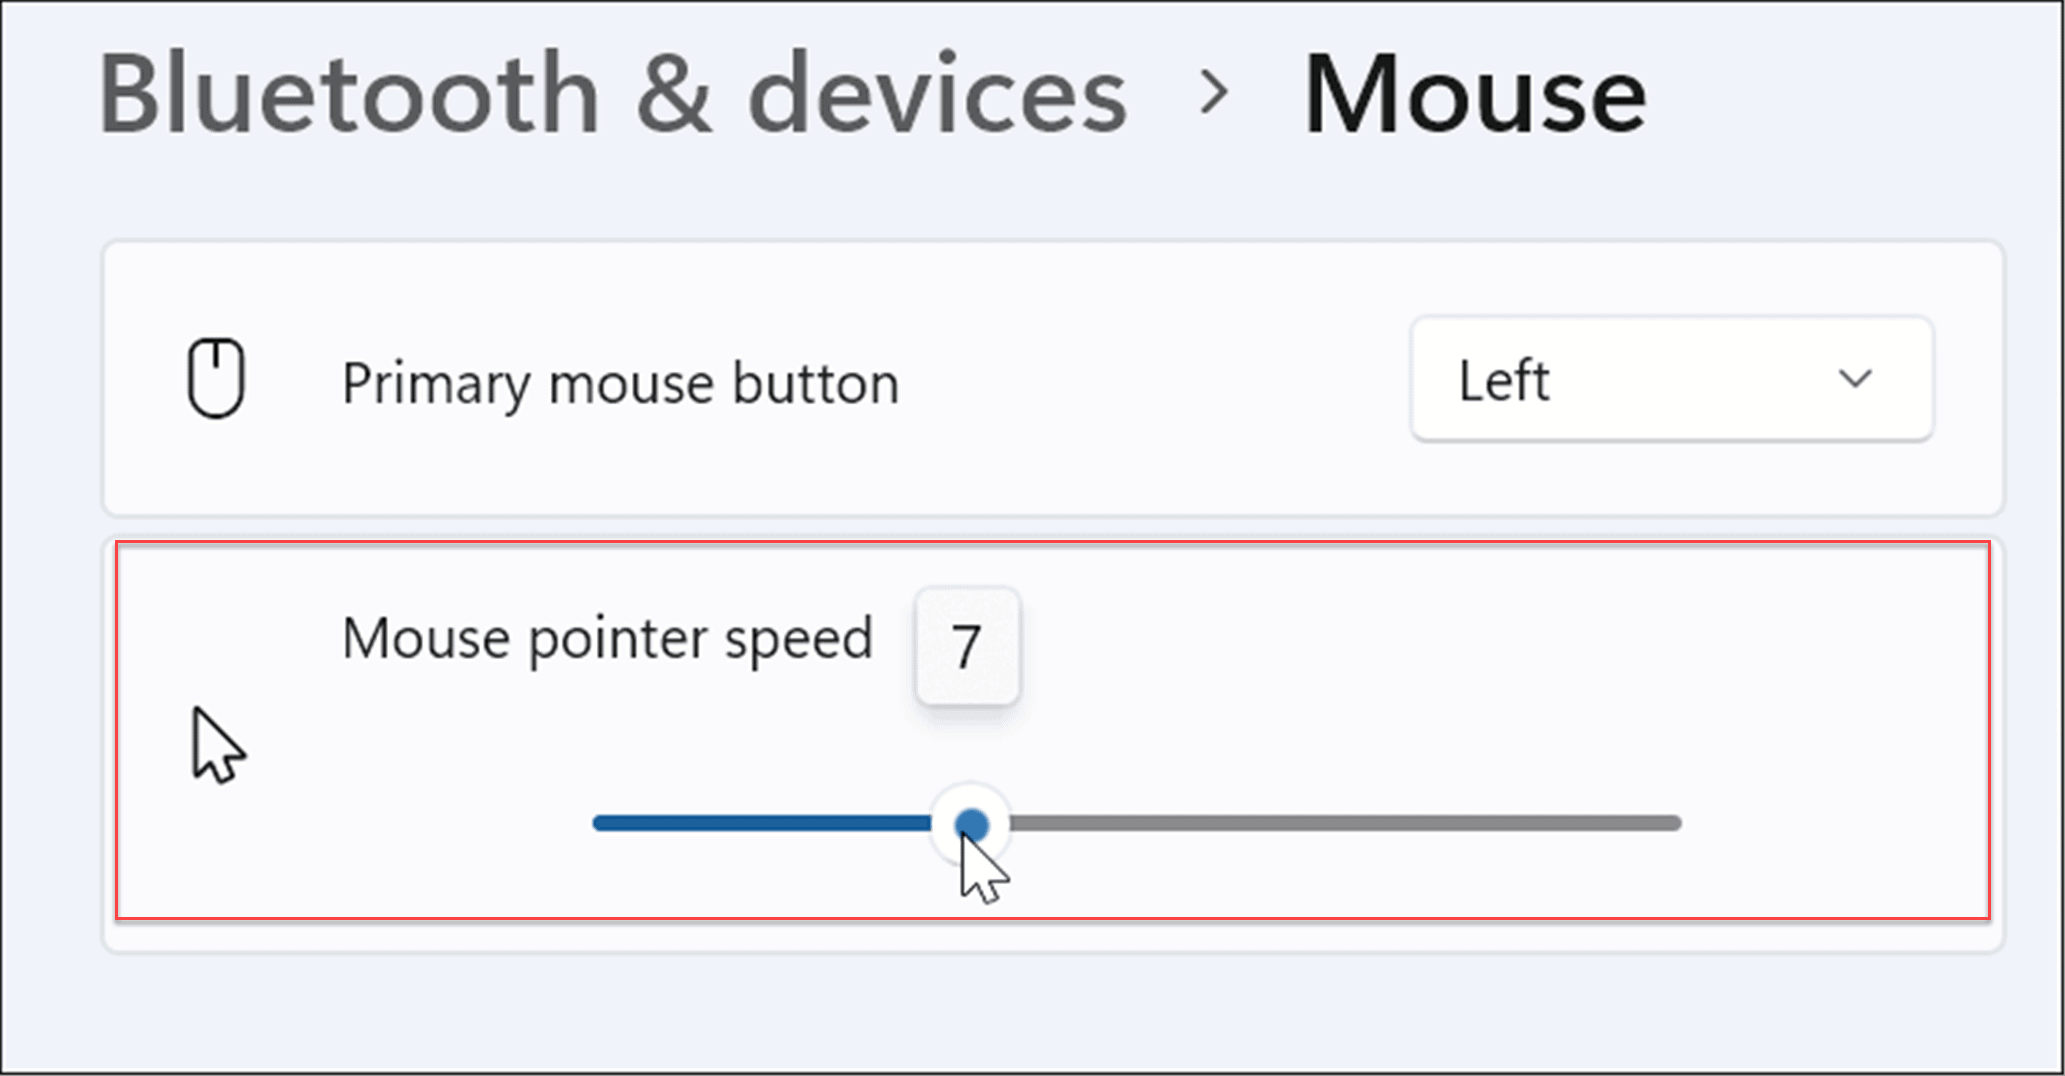
- Use the slider to adjust the Mouse pointer speed to the level that works best for you.

How to Adjust Mouse Sensitivity on Windows 10 via Settings
If you’re running Windows 10, you can also adjust mouse sensitivity using the Settings app, but the steps will be different.
Change the mouse sensitivity on Windows 10 using the following steps:
- Use the keyboard shortcut Windows key + I to launch Settings.
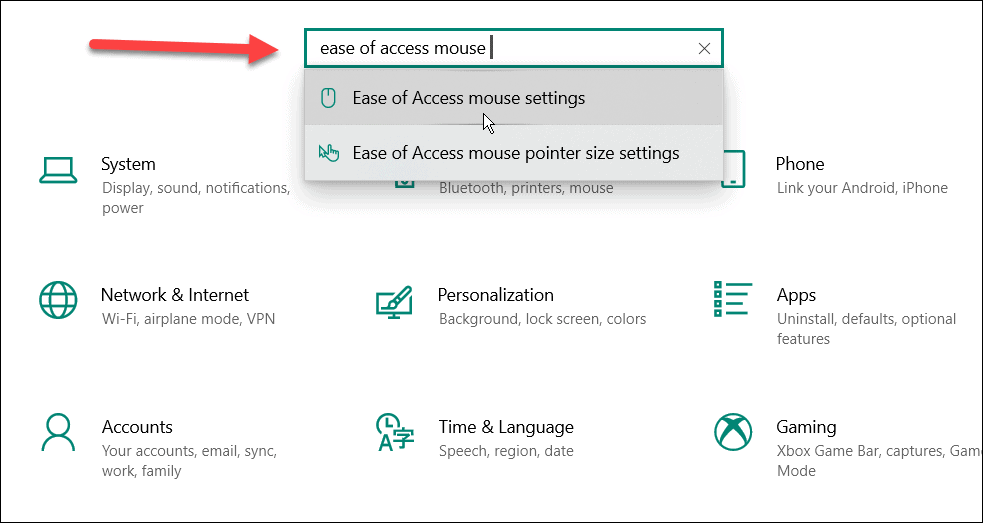
- When Settings opens, search for ease of access mouse and click the first result.

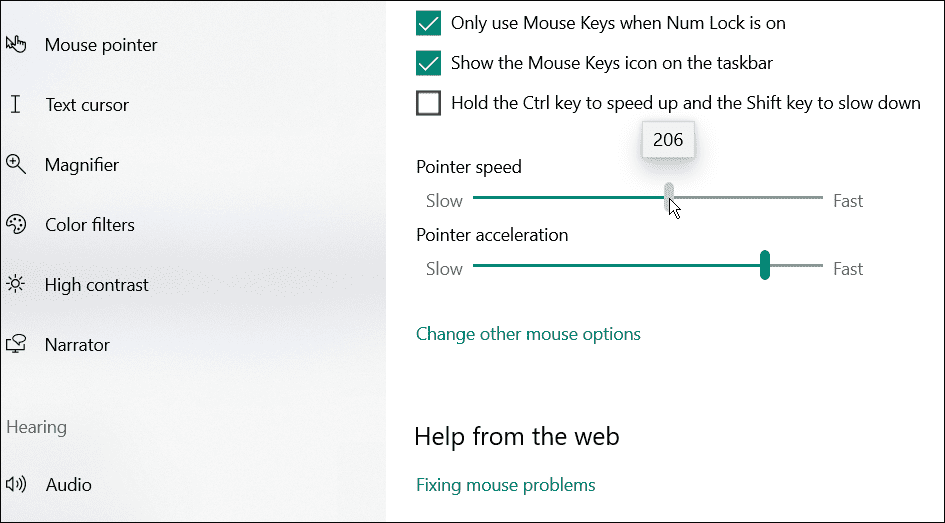
- Adjust the sliders for Pointer speed and Pointer acceleration until your mouse cursor speed is suitable.

Change Mouse Sensitivity via Control Panel
Another way to adjust mouse sensitivity on Windows 10 or 11 is to use the older Control Panel.
To adjust mouse sensitivity through Control Panel, do the following:
- Open the Start menu.
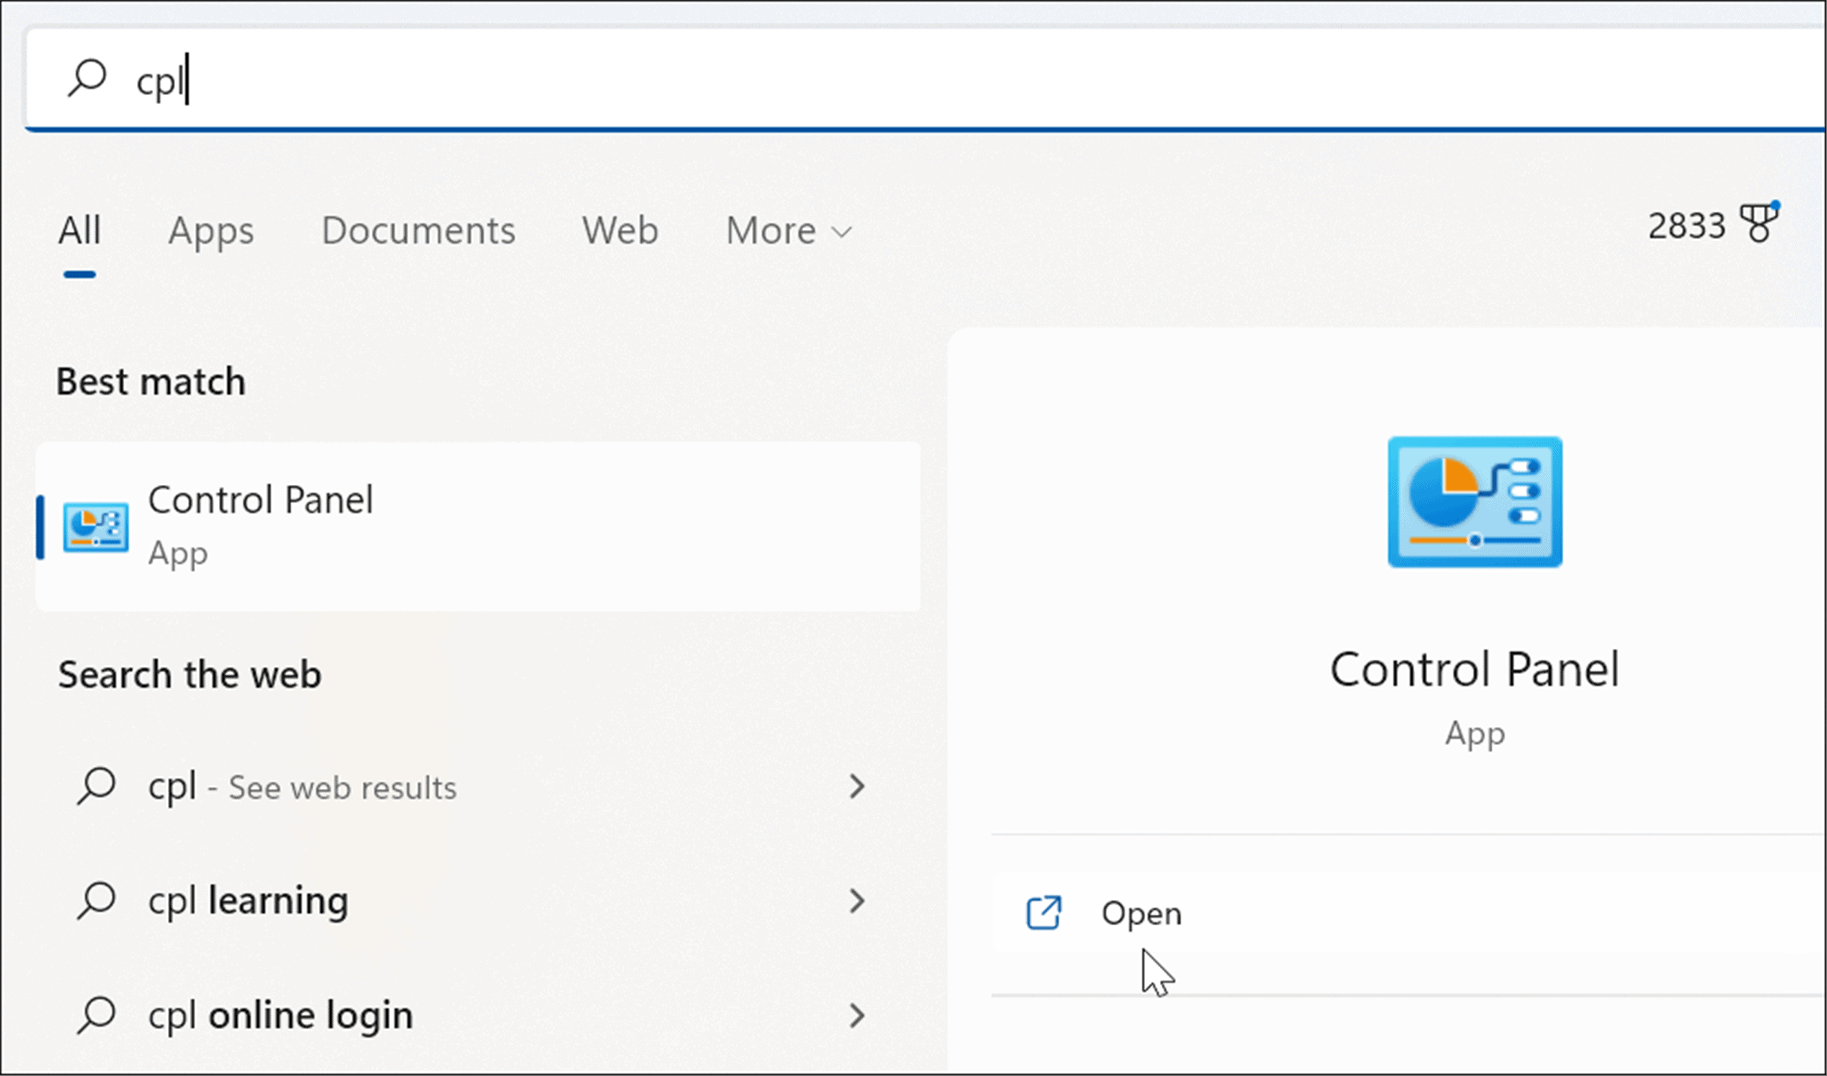
- In Start, type cpl and select the Control Panel app in the Best match section.

- When Control Panel opens, type mouse in the search field.
- Select the Change the mouse pointer display or speed option from the list.


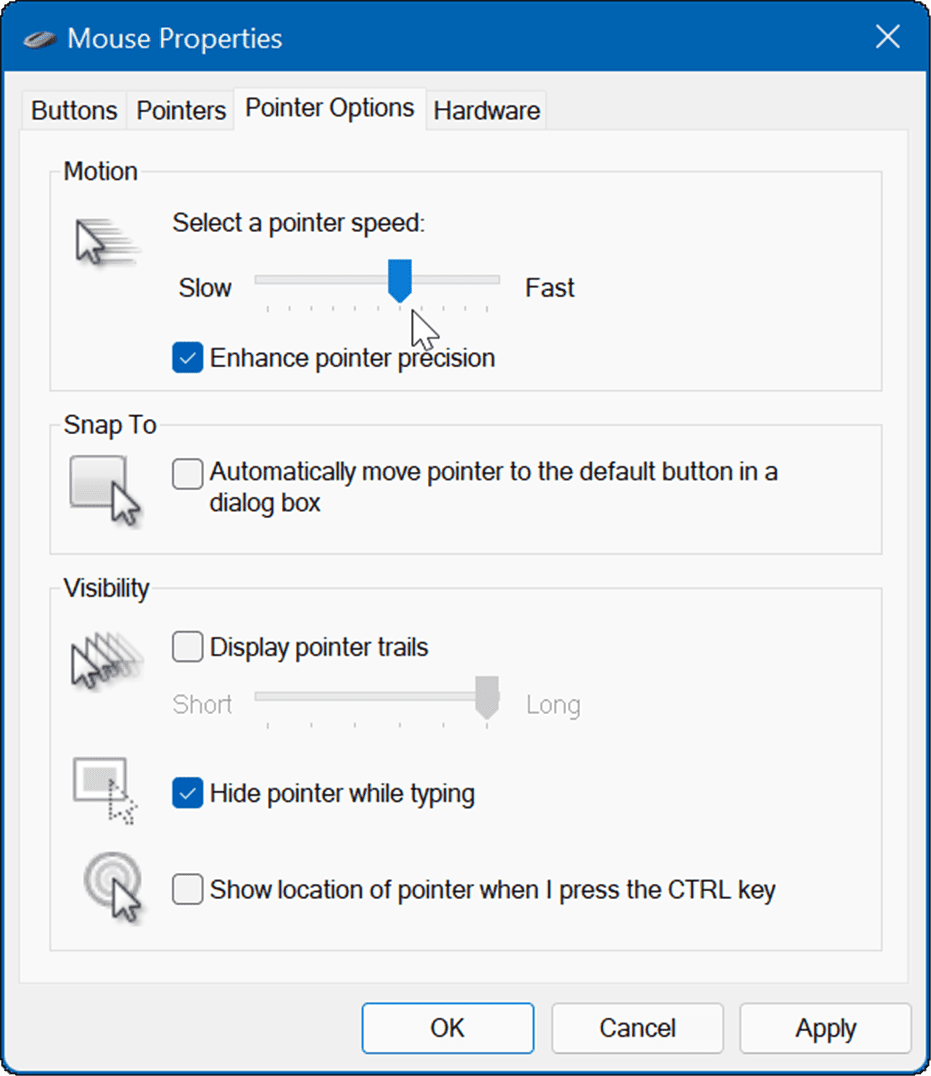
- The Mouse Properties window will open—make sure to select the Pointer Options tab.
- Adjust the Select a pointer speed slider in the Motion section to your preference and check the Enhance pointer precision option.
- Click Apply and OK to apply the setting.

Using Gaming and Other High-end Mice
While you can use the options above to adjust a high-end or gaming mouse’s responsiveness, those mice will also come with their own proprietary software to make adjustments. For example, gaming mice from Razer or professional mice from Logitech have their own adjustment software.
You might have a high-end mouse like a Razer Pro for design or a Logitech G502 for gaming. If so, check the manufacturer’s website for updated software. If you’re going to use a gaming mouse with its own software, leave the default Windows mouse settings. You’ll get a better experience by using the mouse’s software that’s specifically developed for it.
Here’s a look at some high-end professional and gaming mice you may be interested in:
Amazon.com Price updated on 2024-08-15 - We may earn a commission for purchases using our links: more info
Adjust Mouse Sensitivity on Windows
Using the steps above, you can adjust the mouse sensitivity on Windows to better suit your needs. While the default sensitivity settings are generally good for most users, you can tweak your settings at any point.
Of course, there are other settings you can use for a better experience on Windows. For example, you may want to turn off mouse acceleration on Windows 10 or disable a laptop’s touchpad when a mouse is connected. If you have an old Apple Mighty Mouse or Magic Mouse, you can pair it with Windows.
Also, when it comes to adjusting mouse settings on Windows, you can increase the pointer size and color.
Leave a Reply
Leave a Reply


