How to Format an SD Card on Mac
The best way to safely repurpose an old SD card or securely wipe a new one is to format it. If you want to format an SD card on a Mac, follow this guide.
Bought a new SD card or just repurposing a spare? It might be a good idea to format it first.
Formatting an SD card wipes the slate clean by removing any trace of older files. It also allows you to change the file system on an SD card (new or old), allowing other devices the ability to read and write to them—including Macs. There are risks involved, however, and you could lose your data or corrupt your SD card without taking precautions.
If you’re unsure how to format an SD card on Mac and you want to do it safely, follow these steps.
Before You Format SD Cards on Mac
Before you can format an SD card on macOS, you’ll need to make sure you have a card reader. Some Macs have them, but many don’t.
Luckily, SD card readers aren’t expensive. If your Mac doesn’t have an integrated card reader, you’ll need to purchase one.
Next, you need to know the right file system to use. This is pretty easy to figure out. For SD cards smaller than 32GB, use the FAT32 file system. Any cards bigger than 32GB in size require the exFAT file system.
Once you’ve determined the file system you’ll need, you can then begin to format your SD card. The best method is to use the Disk Utility app, but third-party alternatives like SD Card Formatter are available.
How to Format an SD Card on Mac Using Disk Utility
You don’t need any special software to format an SD card on your Mac, as you can use the built-in Disk Utility app instead.
Disk Utility allows you to format SD cards on your Mac safely. You can also use the tool to format USB flash drives, external hard drives, or internal drive partitions.
To format an SD card on Mac using Disk Utility:
- Insert your SD card in the reader. If you’re using a USB card reader, plug it into an available USB port on your Mac.
- Open Disk Utility via the Launchpad folder on your Dock. Alternatively, press Cmd+Space and type disk utility.
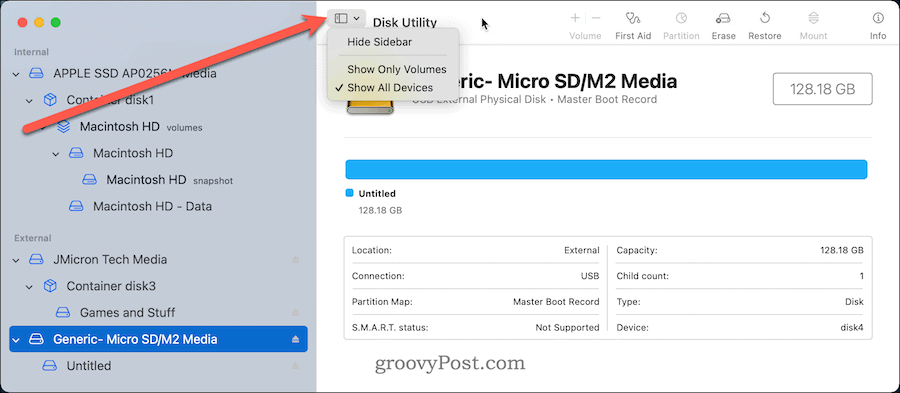
- In the Disk Utility window, press the view icon and select Show All Devices.

- The SD card should be listed in the External section on the left—select it.
- Unformatted SD cards will be listed as UNTITLED or NO NAME. If you’re unsure how to choose the correct drive, look at the storage capacity. It should be close to the sizing advertised on your SD card packaging.
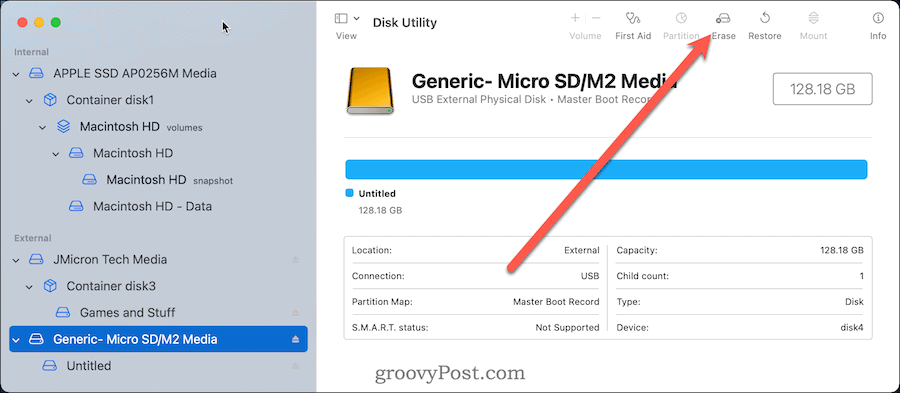
- At the top of the window, click Erase.
- Name your SD card. Keep it short and avoid special characters and spaces to ensure maximum compatibility.
- Next, choose the file system. Pick MS-DOS (FAT) for cards smaller than 32GB and exFAT for larger SD cards.
- Click Erase.
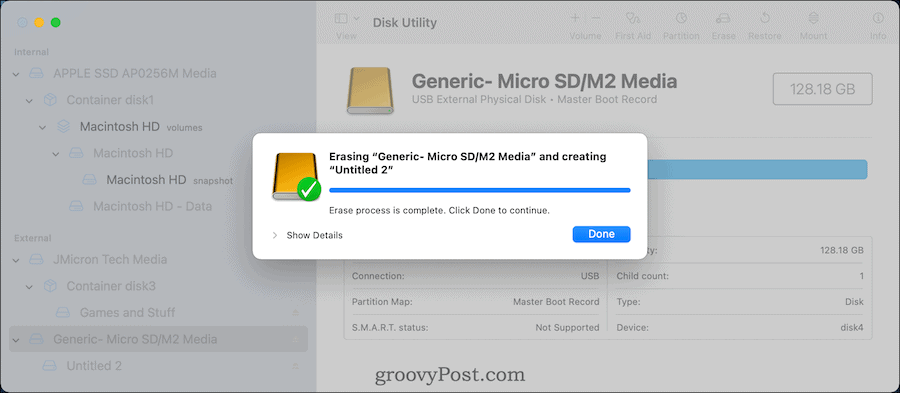
- After a few moments, you’ll see confirmation that the process is complete. Press Done to exit.
If the card is formatted successfully, you can begin using it to store important files or photos. Alternatively, you can remove it from your Mac and use it on other devices that support your card’s new file system.
How to Format SD Cards on Mac Using the Terminal
If you prefer to do things the old-fashioned way, you can also format your SD card using the Terminal app.
Note: You should use extreme caution before you do this. Commands like diskutil will happily erase just about any drive you specify in the Terminal. This is a step for advanced users only—if you’re worried, use Disk Utility instead.
To format an SD card using Terminal on Mac:
- Insert your SD card in the reader. If you’re using a USB card reader, plug it into an available USB port on your Mac.
- Open the Terminal app via Launchpad on the Dock. Alternatively, press Cmd+Space and type terminal.
- To find the unique identifier for your SD card, type diskutil list.
- Look for the word external and match the storage capacity. In this example, /dev/disk4 is the correct drive.
- For 32GB and smaller cards, type the following (and replace /dev/disk4 with your correct drive name):
sudo diskutil eraseDisk FAT32 SDCARD MBRFormat /dev/disk4
- For 32GB and larger cards, type the following (replacing /dev/disk4 first):
sudo diskutil eraseDisk ExFAT SDCARD MBRFormat /dev/disk4

- If prompted, type your user password.
- After a few moments, the command will finish and your SD card will be formatted and ready for use.


How to Erase an SD Card on Mac
If you plan on disposing of your SD card, you should completely erase it first using the dd command on Mac.
This process is called zeroing out your card, as it involves writing over your SD card with binary data—zeros and ones. This removes all data from the card, including any file systems and partition tables. You can also use this tool to remove protected partitions from SD cards that apps like Disk Utility aren’t able to remove.
Note: This will cause irreparable data loss as it wipes your SD card clean. You should only attempt this if you’ve backed up any important files first and you’ve selected the correct card to erase.
To remove protected partitions from SD cards:
- Open the Terminal app via Launchpad.
- Type diskutil list.
- Find and make note of the external drive that you want to erase. The drive should be labeled /dev/diskX, where X is the number of the drive that you want to erase.
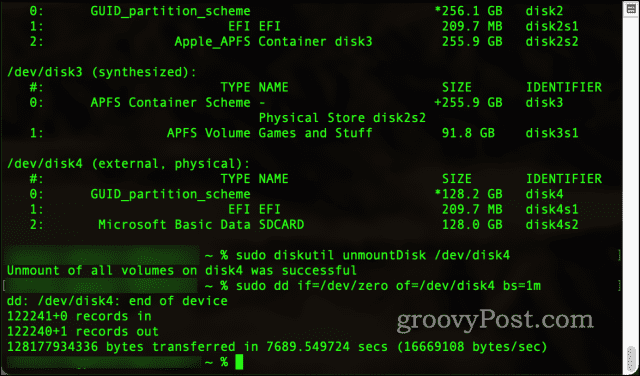
- Make sure the drive isn’t mounted by typing the following (replacing /dev/diskX with the correct drive label):
sudo diskutil unmountDisk /dev/diskX
- To erase the drive, type the following (replacing /dev/diskX):
sudo dd if=/dev/zero of=/dev/diskX bs=1m
- Allow time for the process to complete. Depending on the size of your SD card, this process could take several hours.
- The dd command will output a completion message—exit the Terminal app at this stage.
- Open the Disk Utility app via Launchpad and format your drive using your preferred file system (eg. FAT32 or exFAT).
Formatting SD Cards Using SD Card Formatter
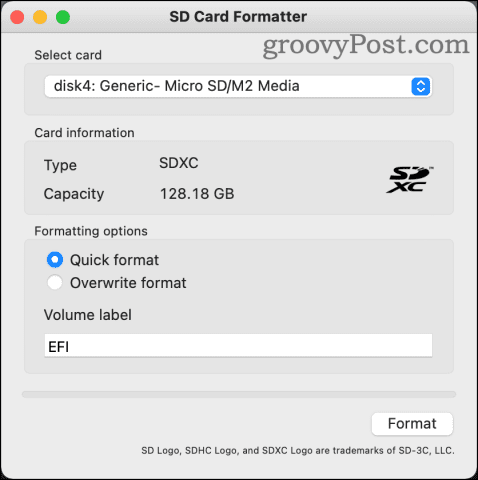
If you’d prefer to use a third-party tool to format SD cards on your Mac, you can use the SD Card Formatter tool.
Provided by the SD Association (the body that controls the Secure Digital specification for cards), this free tool quickly and safely formats SD cards on your Mac. One distinct benefit to this tool is that it will not accidentally erase drives that are not SD cards.
SD Card Formatter also automatically detects the size of your card and chooses the correct file system to use. It’s straightforward to use—select the card, formatting option, and new drive label, then press Format.
SD Card Formatter is available for recent macOS versions, dating back as far as OS X 10.7 Lion. You can download SD Card Formatter from the SD Association website.
Reasons Why an SD Card Won’t Format on Mac
There are a few reasons why your SD card may refuse to format on your Mac. These include:
- Malware infection
- Unsafe or improper ejection.
- The SD card has become corrupted.
- The SD card is protected by some other means.
If you suspect any of these, you can use the dd command to try and wipe the card and start from scratch. If this fails, however, you may have no choice but to replace the card entirely.
Using Your Formatted SD card
Now that you know how to format an SD card on your Mac, you’re free to use it, wipe it, and repurpose it as often as you like.
Just remember to care for your SD cards properly, storing them in a protective case when not in use. You should also look to properly eject or unmount your SD cards when you’re done. Failure to do so could result in data loss or corruption.
If that happens, however, try the zeroing out process using the steps outlined above, then attempt to reformat the SD card. If you can’t reformat it, you’ll need to replace it with a good-quality SD card that suits your needs.
Some cards are rated better for long-term use, while others have a smaller size and more limited lifespan. If you’re worried about data loss on an SD card, make sure to back up your important files first.


Mia
May 9, 2022 at 1:52 am
Thank you for sharing this! This was so helpful! Recovered 2 sd cards (one i erased wrong, but that’s no big deal).