How to Wrap Text Around a Table in Word

Tables are an effective way to add information to your Word documents. Learn how to wrap text around a table in Word with this guide.
When you’re writing a Word document, you may want to include a table or two to illustrate your points.
Creating and customizing tables in Word is simple to do. If you want your table to appear as part of the text rather than outside it, then you’re going to need to know how to wrap text around a table in Word.
If you want to wrap text around a table in Word, follow these steps.
How to Wrap Text Around a Table in Word
By default, tables in Word are placed on their own line but you can wrap text around a table using the following steps.
How Do I Wrap Text in a Word Table
- Click anywhere in the table that you want to wrap text around.
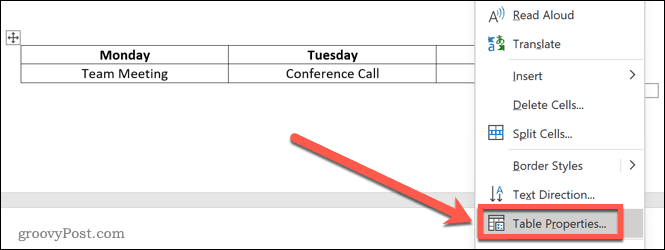
- Right-click and then click on Table Properties.

- Under Text Wrapping, click on Around.

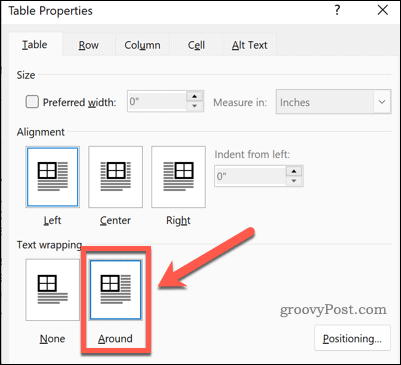
- Click on OK. Your text will now wrap around your table.


How to Resize Your Table in Word
Now that your text is wrapped around your table, you can reposition the table where you want it. Before you can do so, however, you’ll need to be sure that it’s the right size.
How to Resize a Table in Word
- Click somewhere within the table.
- Right-click and choose Table Properties from the menu.


- Click on the Preferred Width checkbox.

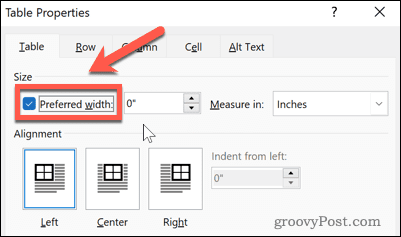
- Set the width that you want. This can be in inches or as a percentage of the width of your page from margin to margin.


- Click OK and your table will resize.


How to Reposition a Table in Word
Now that your table is the size that you want, all that’s left is to move it to the required position. There are two ways to do this. The first is to drag the table into position.
How to Position Your Table in Word by Dragging It
- Click anywhere in your table.
- Click and hold onto the positioning tool to the side of your table.


- Drag your table to its required location and let go.
- Your table will remain in its new position.
Positioning Your Table in Word Using the Table Positioning Options
The above method won’t always leave the table exactly where you want it. It may be affected by line breaks, or be incorrectly aligned. You can move your table more accurately by using the Table Positioning options.
To Position Your Table in Word
- Click on any part of your table.
- Right-click and select Table Properties.


- To align your table, click on one of the alignment options.


- Click on Positioning. Note that this button only appears when text wrapping is set to Around.

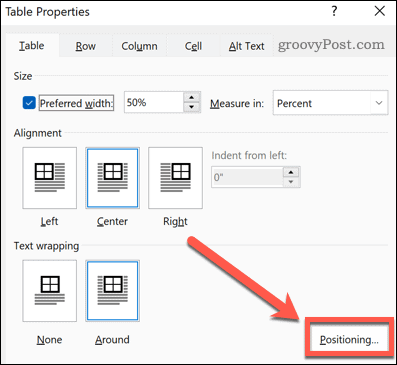
- You can set the horizontal position by choosing the alignment relative to the margin, column, or page.


- It’s possible to set the vertical position as a distance relative to the margin, paragraph, or page.

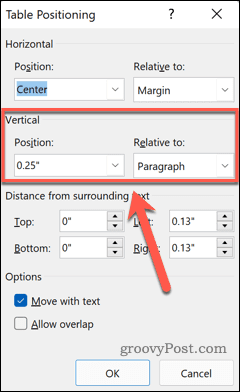
- You can increase the space around your table by changing the Distance From Surrounding Text values.


- Finally, you can decide if your table will move when you move the surrounding text, and whether tables are allowed to overlap each other.

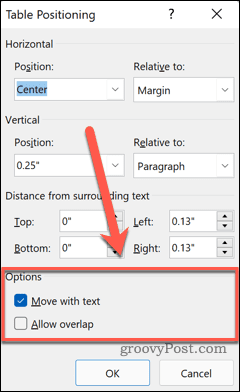
- Once you are happy with your settings, click OK and your table will move to its new position.
Using Tables in Word
Knowing how to wrap text around a table in Word can help you to create a document that looks exactly as you imagined it. Tables aren’t just for spreadsheets; they can be a useful way to impart information in a Word document too.
Leave a Reply
Leave a Reply


