How to Record Voiceover in a PowerPoint Presentation

You can record a voiceover in your Microsoft PowerPoint presentations and then edit the narration and timings to better suit your needs.
One of the more impressive features of Microsoft PowerPoint is the ability to record a voiceover for your presentation. By doing so, you can record narration and times for your presentation to give it a more refined feel. Here are the steps to perform this task.
Record a Voiceover
To add your voice to a PowerPoint presentation, you should first open PowerPoint on your computer. From there:
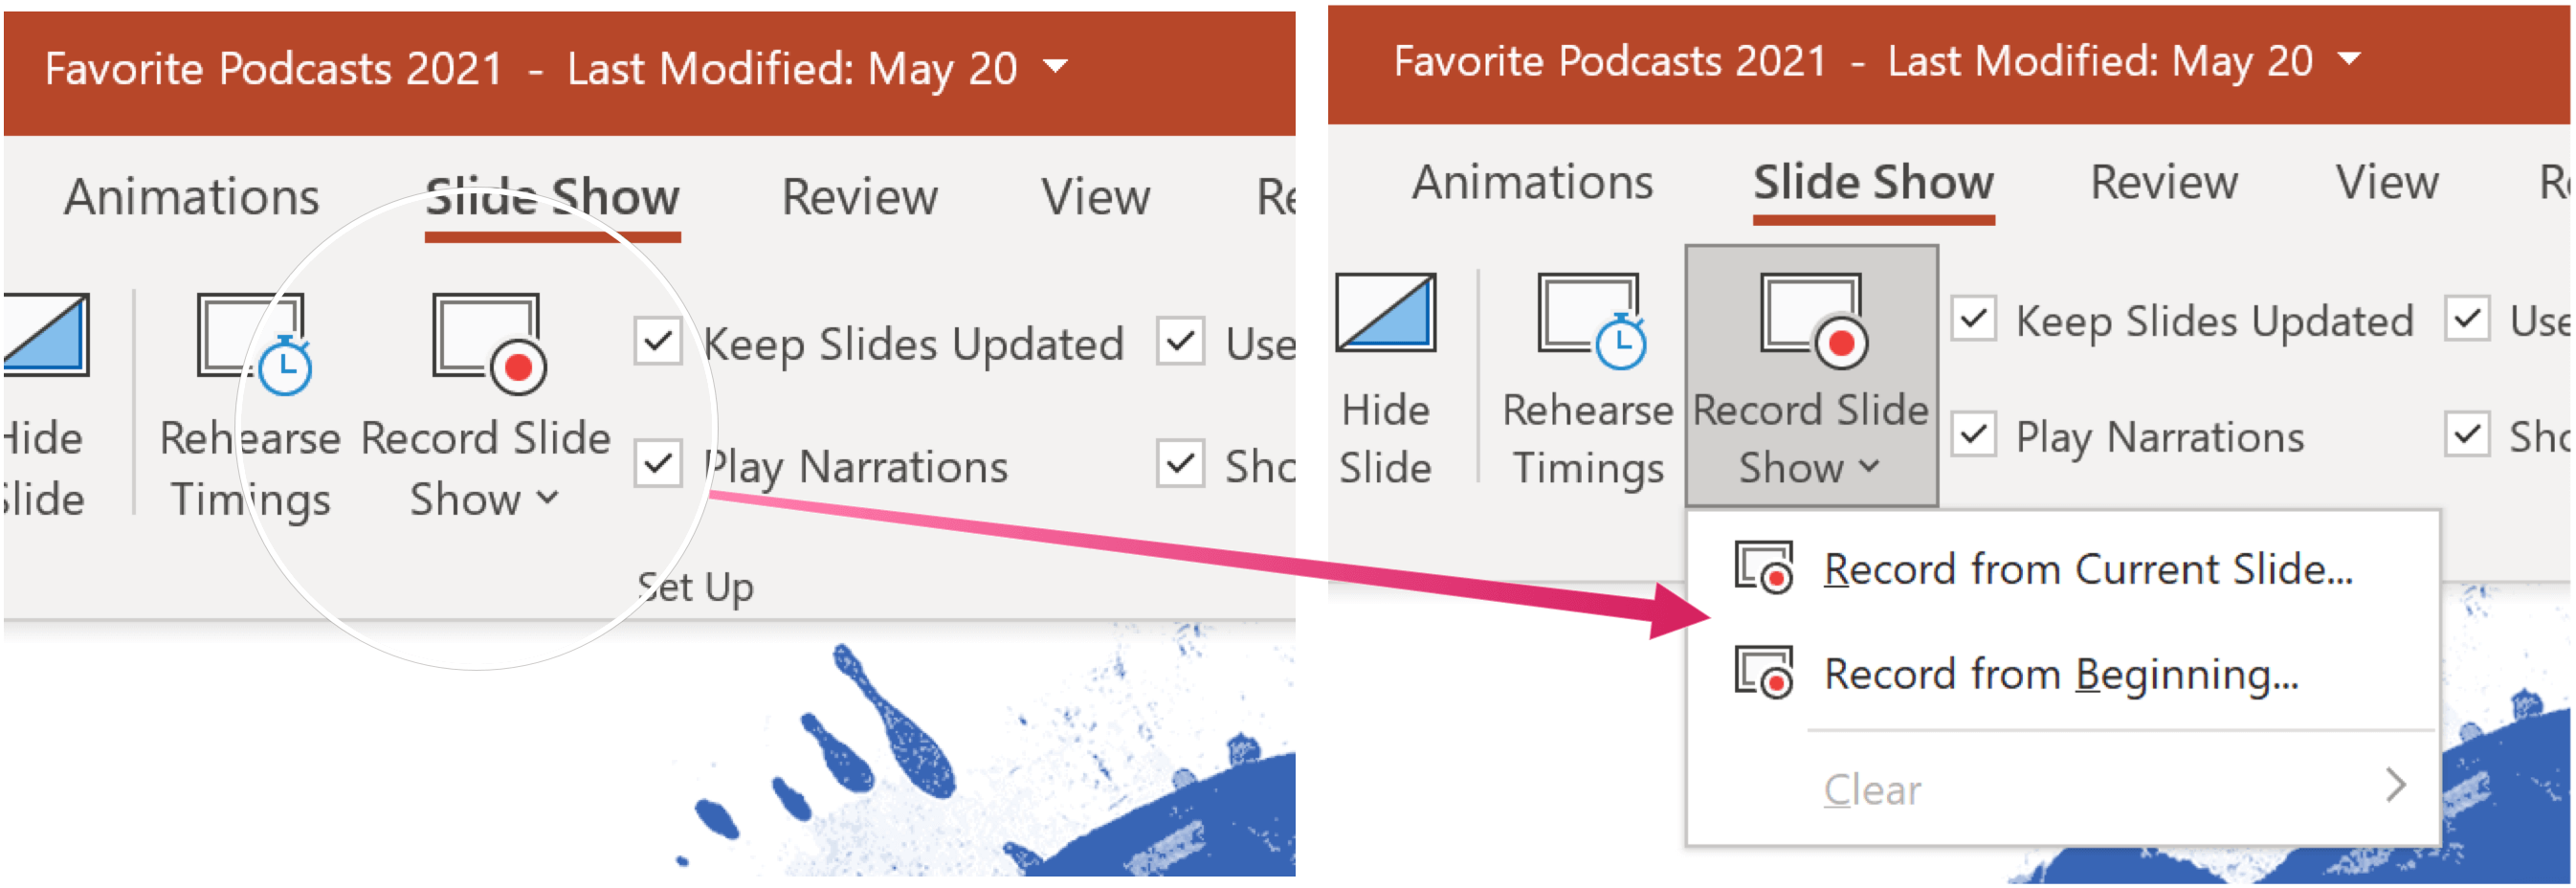
- Select Slide Show on the top menu.
- Choose Record Slideshow.
- You can choose from two options:
- With Record from Current Slide, you can record from a specific slide in your presentation. Be sure you’re on that slide before recording.
- Using Record from Beginning, the record starts at the beginning of the presentation.
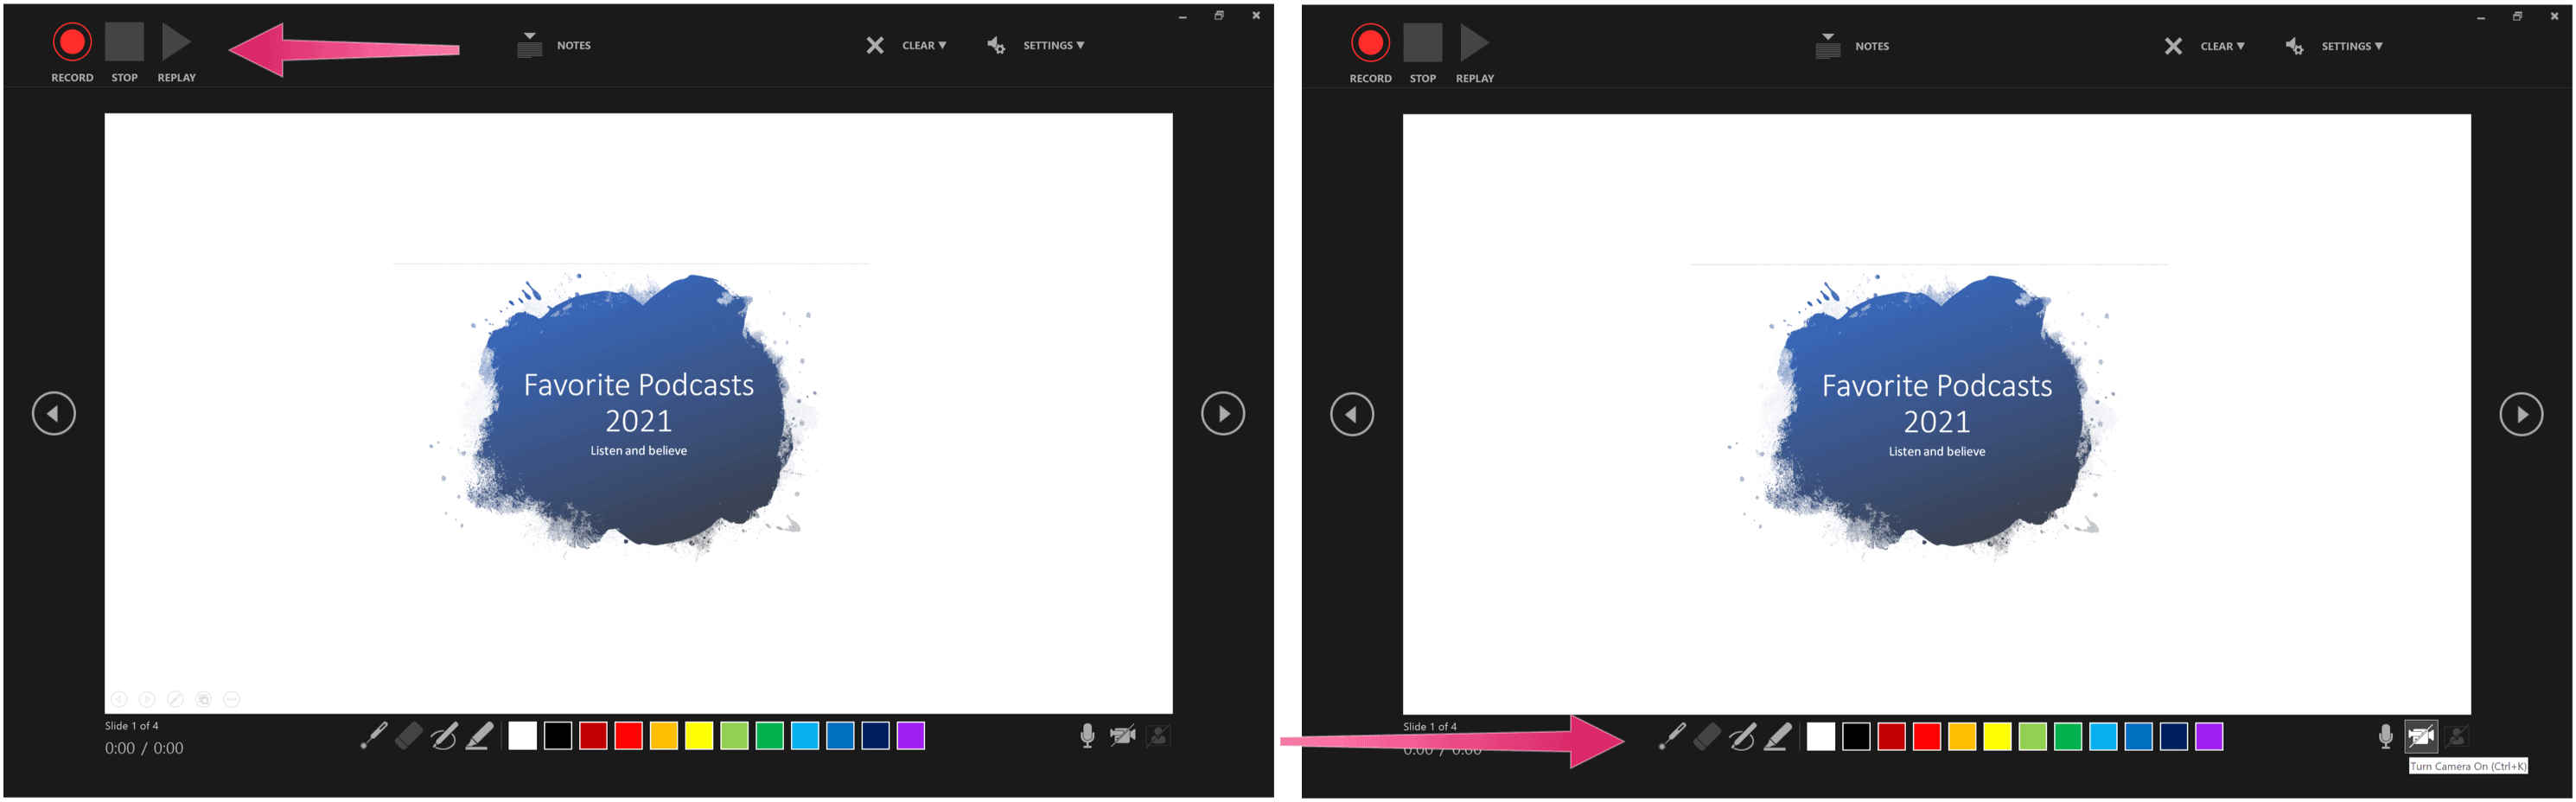
Once you make your selection, choose the Play button at the top left of the screen. Press Stop to stop recording. Narration won’t record when slide transitions happen, so let these play first before you start speaking.
Narration and Timing
There are various tools you can use when recording a voiceover in PowerPoint. These include:
- Pause – to pause a recording.
- Stop – to end a recording.
- Replay – to replay a recording.
- Pen, Highlighter, or Eraser – use the pen, highlighter, or eraser tools to mark up your recording.
Removing Content
You can always remove the narration or timings of your recorded voiceover. On slides where narration exists, you’ll see an audio icon. To remove the content:
- Choose Clear when in recording mode.
- You can choose from two options:
- Using Clear Recording on Current Slide, the narration and timings of the current slide get deleted.
- When Clear Recording on All Slides is selected, narration and timings are removed from all slides simultaneously.
When you’re finished deleting the content, the audio icon is also removed.

Saving Your Voiceover
When you’re happy with your presentation’s voiceover, choose the “X” icon at the top right to exit the section. You can now save your PowerPoint presentation or export it as a video.
If you’re file is saved to Microsoft OneDrive, it’s already being saved automatically. Otherwise, choose File > Save or File > Export. For the latter, then select Create a Video.
More PowerPoint How-Tos
We’ve zeroed in on other PowerPoint how-tos in recent months, including steps to create a timeline to show dates, aligning objects in a presentation, and printing slideshows without notes.
PowerPoint is inside the Microsoft 365 suite. For home use, the Microsoft 365 suite is currently available in three varieties, including a Family, Personal, and Home & Student plan. Price-wise, the first is $100 per year (or $10/month) and includes Word, Excel, PowerPoint, OneNote, and Outlook for Mac. Membership covers up to six users. The Personal version is for one individual and is $70/year or $6.99 per month. Finally, the student plan is a one-time purchase of $150 and includes Word, Excel, and PowerPoint.
Business users can select from Basic, Standard, and Premium plans, starting at $5 per user/month.


