How to Create a Restore Point on Windows 11

If you are making a significant change to your Windows 11 PC, it’s essential to create a Restore Point first. Here’s how to do it.
Windows 11 has a fresh coat of paint and plenty of new features, but many legacy tools are still available. One of which is the ability to create a Restore Point. When you create a restore point on Windows 11, it takes a snapshot of the current working state of your PC.
It’s essential to enable and create restore points from time to time if something goes awry with your system. Another necessary action is creating restore points before making any significant changes to your system. However, it’s not enabled by default, so we’ll explain how to enable and create a restore point on Windows 11.
How to Create a System Restore Point on Windows 11
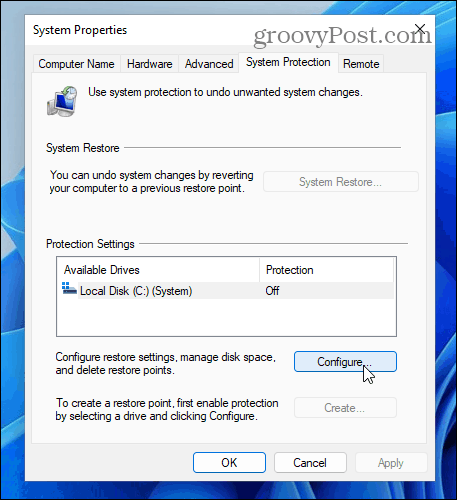
To get started, hit the Windows key or click the Start button, type: restore point, and hit Enter, or click the top result from the search list.

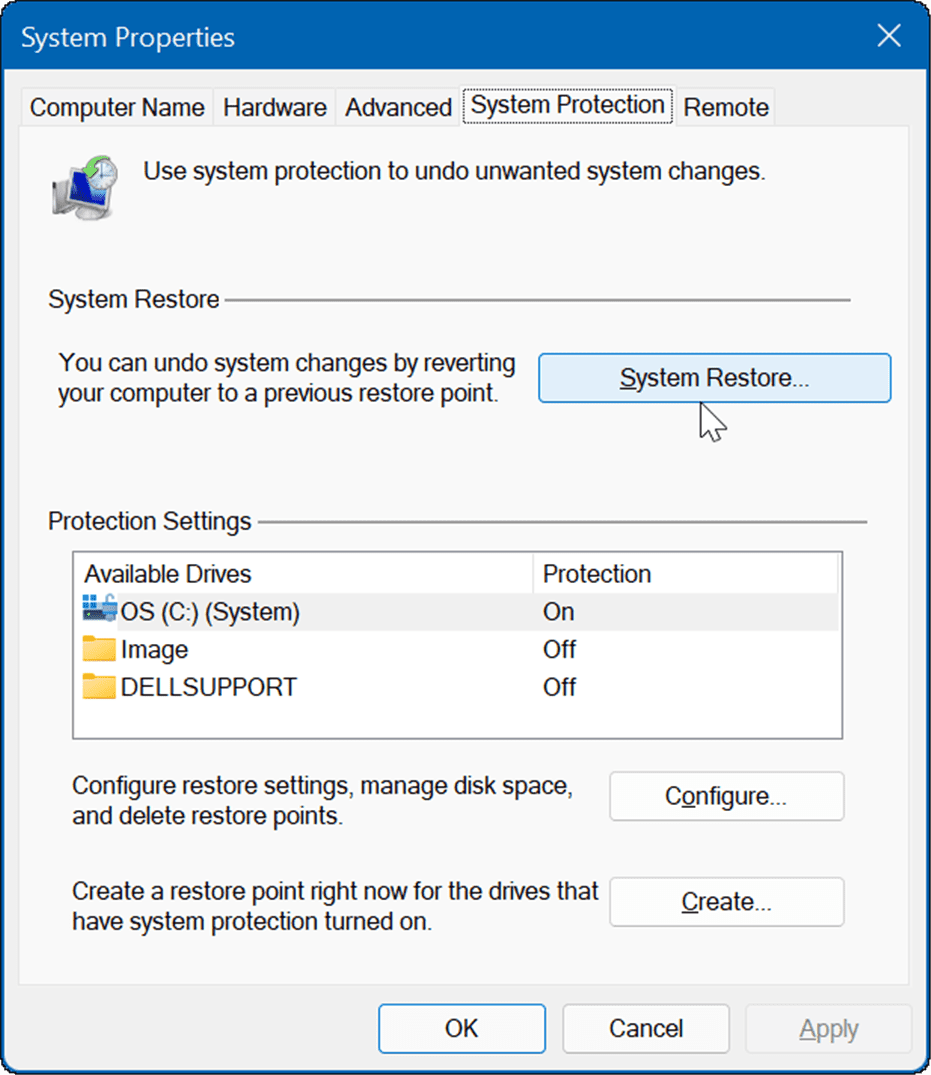
That will open the System Properties window to the “System Protection” tab. From there, click the Configure button.
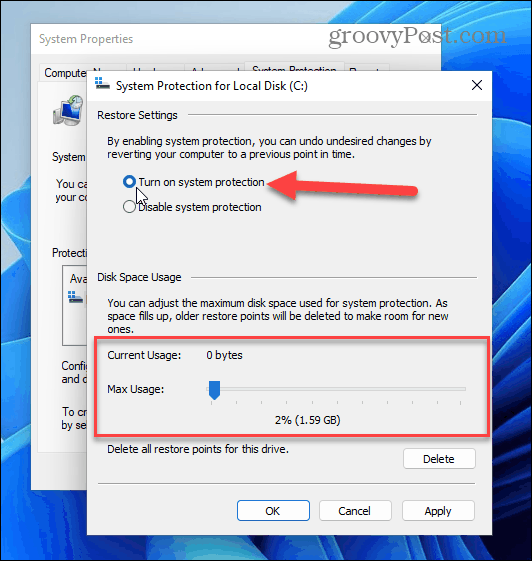
You can move the slider up or down from the following dialog window to adjust the amount of disk space used for the restore points. For example, if you have a disk with a lot of storage, you might want to add more.
On the other hand, you can reduce it if you have a small amount of storage. Typically, the amount of space that Windows assigns will be fine.
When you’re finished, click OK.
Now that System Restore is enabled, it’s time to create a restore point. Click the Create button and follow the onscreen instructions.

First, type in a name that helps you identify the restore point. For this example, I am typing in “Installing Office.”
After creating a memorable name for the restore point, click the Create button.

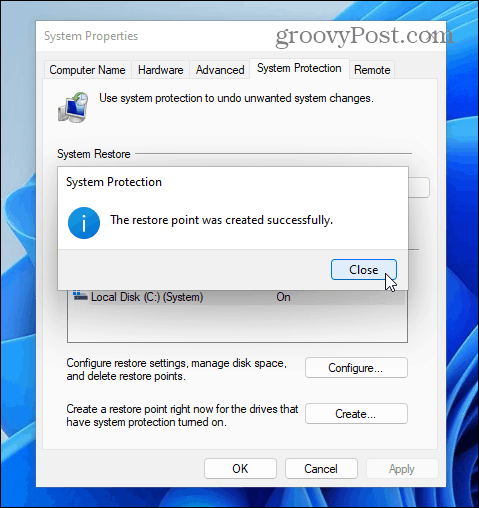
While it’s creating the restore point, you will see a progress bar.

When complete, you will see a message that the restore point was created successfully.
That’s all there is to it. Now you have a restore point of the current working state of your PC. Creating a system restore point from time to time is essential if something goes wrong and you need to recover your system.
Recover Windows 11 with a Restore Point
Of course, the reason for creating a restore point is to recover your system if you need to. Then, using the System Restore utility, you’re able to roll back your system to an earlier time when it was working.
To rollback changes to the device and get a functioning PC again, use the following steps:
- Click the Start button or hit the Windows key, type restore point, and select the top result.

- When the System Properties window opens, click the System Restore button.
- When the Restore system files and settings screen appears, click Next to begin the on-screen wizard.

- On the following screen, choose the restore point you want to use. To see more, check the Show more restore points option on the left. You can optionally click the Scan for affected programs button to view apps that will be removed during the restore process.

- Confirm the restore point and click the Finish button. If the restore point you chose doesn’t look correct, you can still click the Back button and change it.

That’s it. The Restore Point utility will apply the restore point you select and return the PC to a working state. Note that your system will restart during the process.
Restoring Windows 11
The built-in system restore tool in Windows is just one way to recover your system. For more, read about creating a full backup of Windows 11. You’ll also want to know how to recover Windows 11 from a backup. Backing up your system is always essential, especially before tweaking the Registry. The good news is you can backup the Windows Registry first.
System Restore on Windows 11 still works like previous versions. If you’re not on Windows 11 yet, read about creating a Windows 10 restore point manually.
For more tips on how to handle the new version of Windows, take a look at how to empty the Windows 11 Recycle Bin automatically.