How to Fix a Driver Can’t Load on This Device Error on Windows
Have trouble with an error that a driver can’t load on Windows? This guide explains how to troubleshoot it.
Windows 11 is a far more stable operating system than some of its predecessors, but one of the biggest problems I still have is when I’m dealing with hardware driver issues. If a driver won’t update or load properly, giving an error on Windows, I can’t use the device. I’m forced to troubleshoot the cause.
Thankfully, I know a few tricks that can help me figure out what to do if I get the “a driver can’t load on this device” error on my Windows PC. If this happens to you, follow the steps below.
Check for Driver and System Updates
When a driver won’t load, it’s a good idea to start by checking for both new drivers and new system updates on your PC. A fresh update will (hopefully) come with bug fixes to help fix otherwise uncommon problems.
If you want to check for both driver and system updates at once, you can use Windows Update to do so.
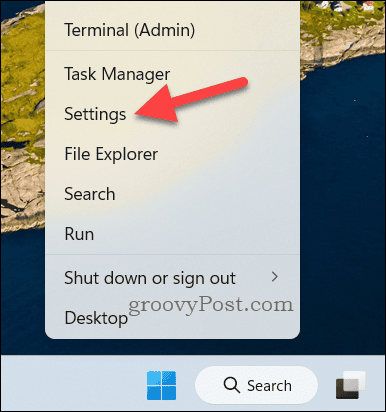
- Start by right-clicking the Start menu and selecting Settings.

- Next, click Windows Update > Check for updates button. This will begin to check whether you have any new updates you can install.

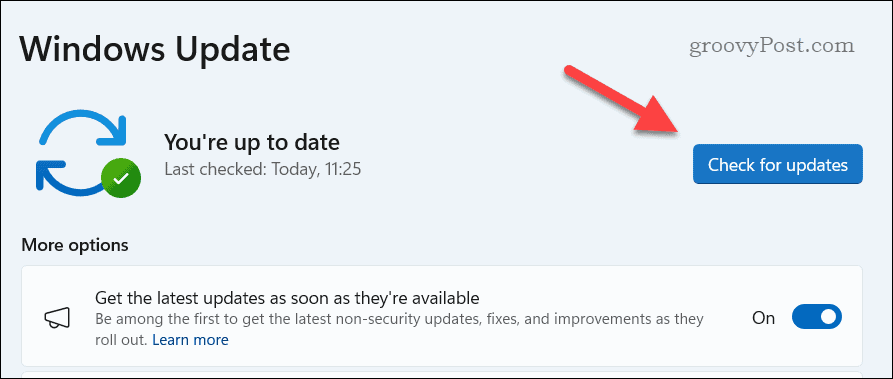
- If any updates are discovered, click Download & install to begin the installation process. This may take time to complete.
- Once that’s done, to check for new driver updates, click Advanced options > Optional updates > Driver updates. Select any of the updates listed, then press Download & install to begin the process.

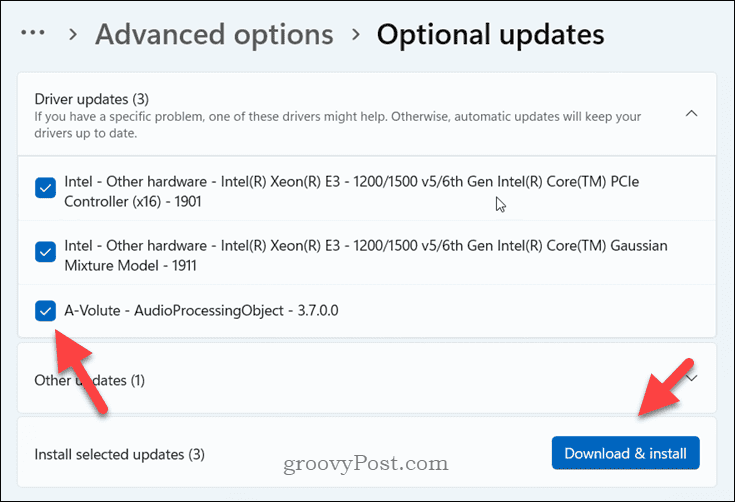
If you don’t see any new driver updates, it might be worth checking your device manufacturer’s website, as they may have more recent updates available. This is especially true for devices like graphics cards, where the update frequency is far more frequent than other types of devices.
Reinstall (or Roll Back) the Problematic Driver
If you’re seeing a driver error just after installing a driver, then the answer is simple—roll it back, or try to reinstall it. You can do this via the Device Manager.
- First, right-click the Start menu and select Device Manager.

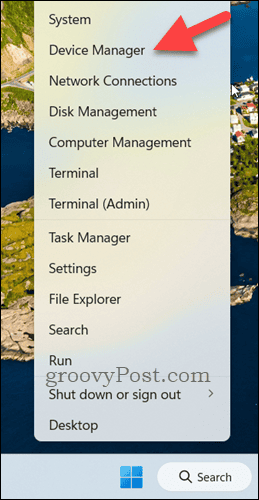
- Locate your device in the menu, right-click it, and then select Uninstall device.


- Accept any prompts to confirm your decision, then restart your PC. Windows will automatically try to reinstall the driver when you restart.
- Otherwise, to roll back a driver, right-click the device in Device Manager and select Properties instead.

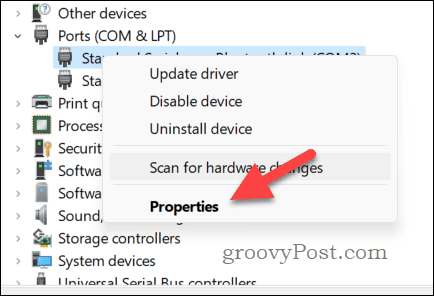
- Go to the Driver tab and select Roll Back Driver, if the option is available.

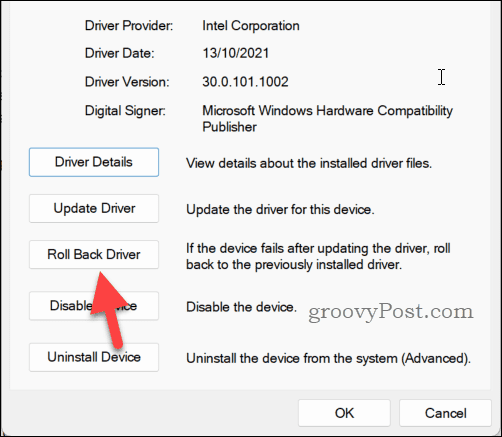
- Follow any additional on-screen instructions to complete the rollback, then restart your computer for the changes to take effect.
Disable the Memory Integrity Feature to Troubleshoot a ‘Driver Won’t Load’ Windows Error
Memory Integrity is a part of Core Isolation, a security feature of Windows that prevents attacks by isolating computer processes from your operating system and hardware. If you’re seeing the driver can’t load on this device error, however, you may need to switch this off to try and resolve the compatibility issues you’re having.
I’d recommend only doing this as a temporary troubleshooting measure to help you switch to another driver if you’re having problems. Microsoft designed this setting to protect your PC, after all. To disable Memory Integrity, follow these steps.
- Right-click the Start menu and select Settings.


- In Settings, click Privacy & security > Windows Security > Open Windows Security.

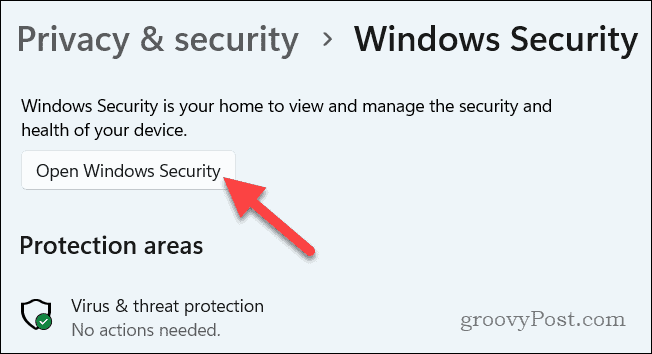
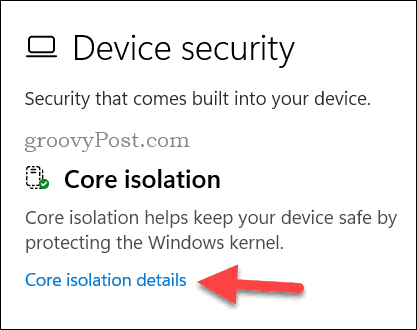
- In the Windows Security window, click Device Security > Core isolation details.

- Click the slider next to the Memory Integrity option, switching it to the Off position.

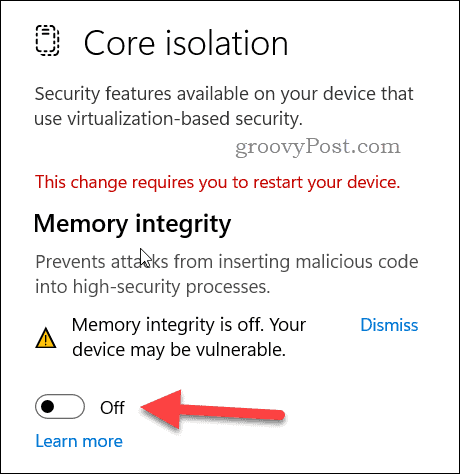
- Restart your computer for the changes to take effect.
With Memory Integrity switched off, see if you’re able to use your hardware with the correct driver. You may want to update to a different driver at this point or troubleshoot further. However, make sure to switch Memory Integrity back on once you’re finished by retracing these steps and clicking the Memory Integrity slider back to the On position.
Reinstall or Remove Apps or Games Impacted by Driver Issues
You’ll usually see a driver error when you try to interact with your device in some way. An obvious example is your graphics card, which might throw up a device error when you’re launching a new game.
I’ll assume you actually want to keep the app or game you’re using, so in the first instance, it’s worth removing and reinstalling it. If there’s a software fault, a quick reinstall can fix the problem. Otherwise, you may need to scrap your plans and remove the app entirely, assuming there isn’t a hardware problem at fault.
- To remove and reinstall on Windows, right-click the Start menu and select Settings.


- Click Apps > Installed Apps.
- Locate the app or game you want to remove, then click Uninstall > Uninstall to remove it.


- Once removed, reinstall the app or game using your installation media or source (such as Steam).
- Launch the app or game to see if the problem is fixed once the installation is complete.
Fixing Device Errors on Windows
For most driver errors, switching back or reinstalling the driver will fix the problem. The steps above should help you to do that. If this doesn’t fix the problem, you’re going to need to troubleshoot a bit deeper and look at whether your hardware is working properly.
For instance, if a graphics card is failing, you might see it refusing to load when you’re playing a new game. See if you can replicate the error and, if you still can’t fix things, drop a comment below to see if we can help with a few more suggestions.
Leave a Reply
Leave a Reply


