Why the Creality K1C 3D Printer Deserves a Spot in Your Workshop
The Creality K1C is a moderately priced fully enclosed 3D printer that can print using carbon fiber-filled filament. Read on to learn if it’s worth a spot in your workshop.
I’ve become a bit of a 3D printing enthusiast and have been slowly building up my own “farm” of 3D printers. I’ve reviewed several Creality 3D printers already, so when the company offered me the opportunity to test its newest flagship product, the Creality K1C, I jumped at the chance.

A selection of models printed using the Creality K1C. Only the “Flexi Factory” badge was printed on a different 3D printer since the K1C does not support multicolor printing.
Creality unveiled the K1C in early 2024, the newest addition to their fully enclosed K1 flagship line of 3D printers This printer retains the distinctive high-quality, rigid frame and tinted transparent part-glass enclosure that characterizes the series. This enclosure helps maintain a heated inner chamber, ideal for working with specialist materials.

You might think the C would stand for color, or rather multicolor, but nope. That feature hasn’t arrived in the K1 lineup yet. I’m told it’s coming as an add-on accessory at some point, but for now, it’s a feature reserved for the yet-to-ship K2 Plus.
Instead, C stands for “Carbon Fiber.” The K1C enhances the capabilities of both the K1 and K1 Max, incorporating additional features that set it apart. One of those is an upgraded nozzle that can better withstand abrasive carbon fiber-filled filaments.

Amazon.com Price updated on 2024-08-15 - We may earn a commission for purchases using our links: more info
Engineered for Carbon Fiber
A standout improvement is the completely revamped tool head, which now includes a 300° hot-end with a hardened steel nozzle tip. Creality calls it a “unicorn” nozzle. This design is perfect for handling specialist materials like carbon fiber, making the K1C particularly appealing to industry professionals.

The new, upgraded hot-end on the Creality K1C
This enhancement brings to mind the specialized carbon heads of the Cel-Robox Dual from a few years ago. Its design is meant to better withstand the grit and particulates in carbon fiber-filled PLA, PA, and PET.
While it shares the same size and mechanical specifications as the K1, the K1C benefits from advanced features like the AI camera, previously exclusive to the larger K1 Max. Creality has also added a rubber brush to the rear of the magnetic build plate for cleaning the nozzle before bed leveling and printing. A label just inside the interior gives slicing parameters for various filament types.

Although the K1C is not a direct replacement for the K1, the slight price difference makes it an attractive upgrade. With its versatility and advanced features, the K1C emerges as a compelling choice for anyone considering a 3D printer from Creality’s K1 series. Unless that is, you prefer to wait a few months for the K2 Plus multicolor model to start shipping.
Let’s dive into why I think the K1C is a great addition to your workshop now, though.
What Comes In the Box
As you unpack the Creality K1C, you’ll notice there won’t be much assembly required. More on that momentarily, but here’s what you should find in the box as you pull everything out.
- The Crealty KC printer itself
- A pair of side cutters
- A plastic scraper
- Hardware necessary to finish assembly
- A USB stick containing the user manual and sample models to print
- A sample spool of white Creality Hyper PLA
You’ll also find a quick start card to help you finish assembling your 3D printer. The full user manual, along with a copy of Creality Print slicer software and a few sample models to print.
Getting the Creality K1C Up and Running
There’s very little you’ll need to do to get the Creality K1C printing. Since it comes about 98% assembled right out of the box, finalizing the assembly is pretty easy. You need to pop on the air filter to the back, screw on the filament holder, and plug in the touch screen.
There are also three screws holding the print bed in place during shipping. You’ll need to remove those, and that’s not the easiest job in the world. The screws are small but long, and they’re in a tightly confined space at the bottom of the printer.
Once that’s done, and you’ve made sure to set the power supply to the correct voltage for your country, you can plug the printer in and turn it on. It will run an automatic leveling program that both levels the bed and performs input shaping to adjust the settings to accommodate for vibration and resonance. This will take about 15 minutes, then you can move on to loading the filament and beginning your first print.
Loading the Filament: an Awkward Procedure
Loading the filament is a bit tricky. First of all, Creality’s instructions for doing so are a bit lacking; I had to check the support tutorials for the original K1 to learn exactly what to do. You feed the filament through the runout sensor on the back through the reverse Bowden tube. Once it reaches the extruder, move the locking lever on top of the extruder so you can feed the filament the rest of the way to the gears.
When feeding the filament, you might find the curve of the Bowden tube along the chain and into the extruder causes a bit of a jam. Just pull the filament back a bit and feed it again, adjusting the curvature of the Bowden tube if you need to. Lock the lever on top and use the touchscreen to extrude the filament. You may need to repeat the Extrude step a couple of times and may need to push the filament deeper into the extruder again.
Now, the rear placement of the filament holder is a bit awkward. I had to turn my printer around to load filament, simply to give myself enough room to work comfortably. Creality does include the STL files to print a couple of options for side-mounting the filament holder and those do help.

Unfortunately, you still have to deal with the runout sensor placed on the back of the printer. My next project is going to be relocating that sensor to the side, which should make loading and unloading filament an absolute breeze.
Another Recommended Mod
There’s one other mod I’d recommend for the K1C. As shipped, the chain and PTFE filament tube will strike the K1C’s lid whenever the extruder moves all the way to the left. While this shouldn’t cause any problems with print quality, it can be a disconcerting sound. There are several risers you can print to alleviate this.
You might also appreciate a riser that includes an air vent you can open and close. Creality recommends removing the lid or opening the door if the chamber temperature exceeds 34º Celsius for PLA. Opening an air vent near the top of the printer will usually eliminate the need to do this.

Beneath the lid, you can see a riser printed to keep the chain connected to the extruder from striking the printer’s lid.
3D Printing Jobs on the K1C
There are three convenient methods to transfer files to the K1C for printing. You can use a USB stick, connect to the 3D printer via WiFi, or use Creality Cloud. Like most similar portals by other 3D printer manufacturers, Creality Cloud’s interface is very busy and overly gamified. Still, you might enjoy the experience.

Slicing Your STLs
Creality has its own software, based on an older version of Utilimaker Cura and called Creality Print. Using Creality Print, you can retrieve files from Creality Cloud, slice STLs for printing, and transmit the G-code to the K1C. While using the Cloud is optional, the program allows you to drag and drop STL files from your hard drive into the slicer, and you can transfer files using Wi-Fi or a USB stick.

Creality Print is user-friendly and comes with numerous presets for various filaments. Although its layout differs from Cura or PrusaSlicer, it offers the same functionalities. The software’s Device tab serves as a streamlined Klipper screen, displaying your printer’s file storage, temperatures, motion system, and camera. You can even use the Object Exclude feature from here.

From the Device tab, you can also drag and drop files from other slicers directly to your printer. While there are no built-in profiles for Cura or PrusaSlicer at this time, creating them is straightforward using an Ender 3 as the base.
Printing the Files
The K1C is a fast powerhouse, and it can handle many different types of filaments. The 3D printer can even handle carbon fiber-filled filament with ease, allowing a bit more variety to what you can print.

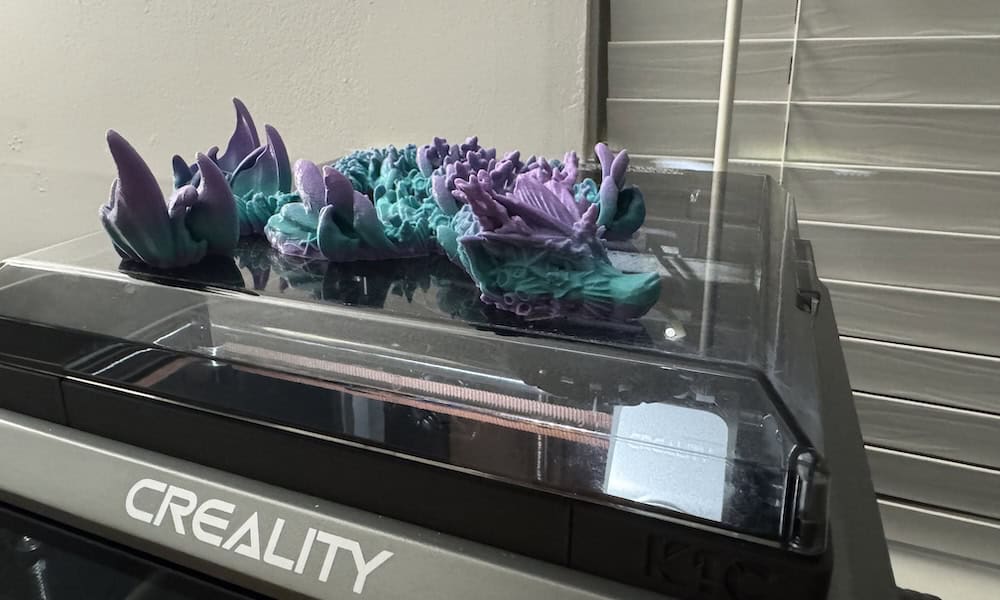
I’ve experienced terrific results printing on the Creality K1C. Every model shown in this article was printed with ease without using any supports. The only recommendation I have is to enable Skirt under Build Plate Adhesion. The priming line the extruder prints before starting the first layer isn’t always enough to get the filament flowing properly.
Final Thoughts
The Creality K1C is a great 3D printer and a good improvement over the K1. However, it does lack multicolor printing support coming soon in the K2 Plus. While Creality assures me the entire K1 lineup, including the K1C, will eventually have an upgrade path to do multicolor 3D printing, you may prefer to wait for the K2 Plus to start shipping in October 2024.
The Creality K1C retails for $559 from the manufacturer’s store, but discounts are often available.


