Accessibility: How to change the cursor color in macOS Monterey
In macOS Monterey, you can adjust the cursor color for the first time. This includes its outline and fill colors. Here are the steps.
In macOS Monterey, Apple’s introducing cursor-based accessibility tools. These include the ability to change both the outline and fill-in color of the cursor. In this article, you’ll earn how to change the cursor color in the latest version of macOS. Additionally, we’ll address other cursor-related accessibility options for Mac.
What’s Changed: Cursor Color
Before macOS Monterey, cursor accessibility features were limited to locating the mouse pointer by shaking it and changing the cursor size. In the latest Mac update, there’s now the ability to change the cursor color.
Change the Cursor Pointer Outline
To change the cursor outline in macOS Monterey:
- Click on the System Preferences icon in the Mac dock.
- Select Accessibility.
- Choose Display on the left side of the accessibility box.

Next:
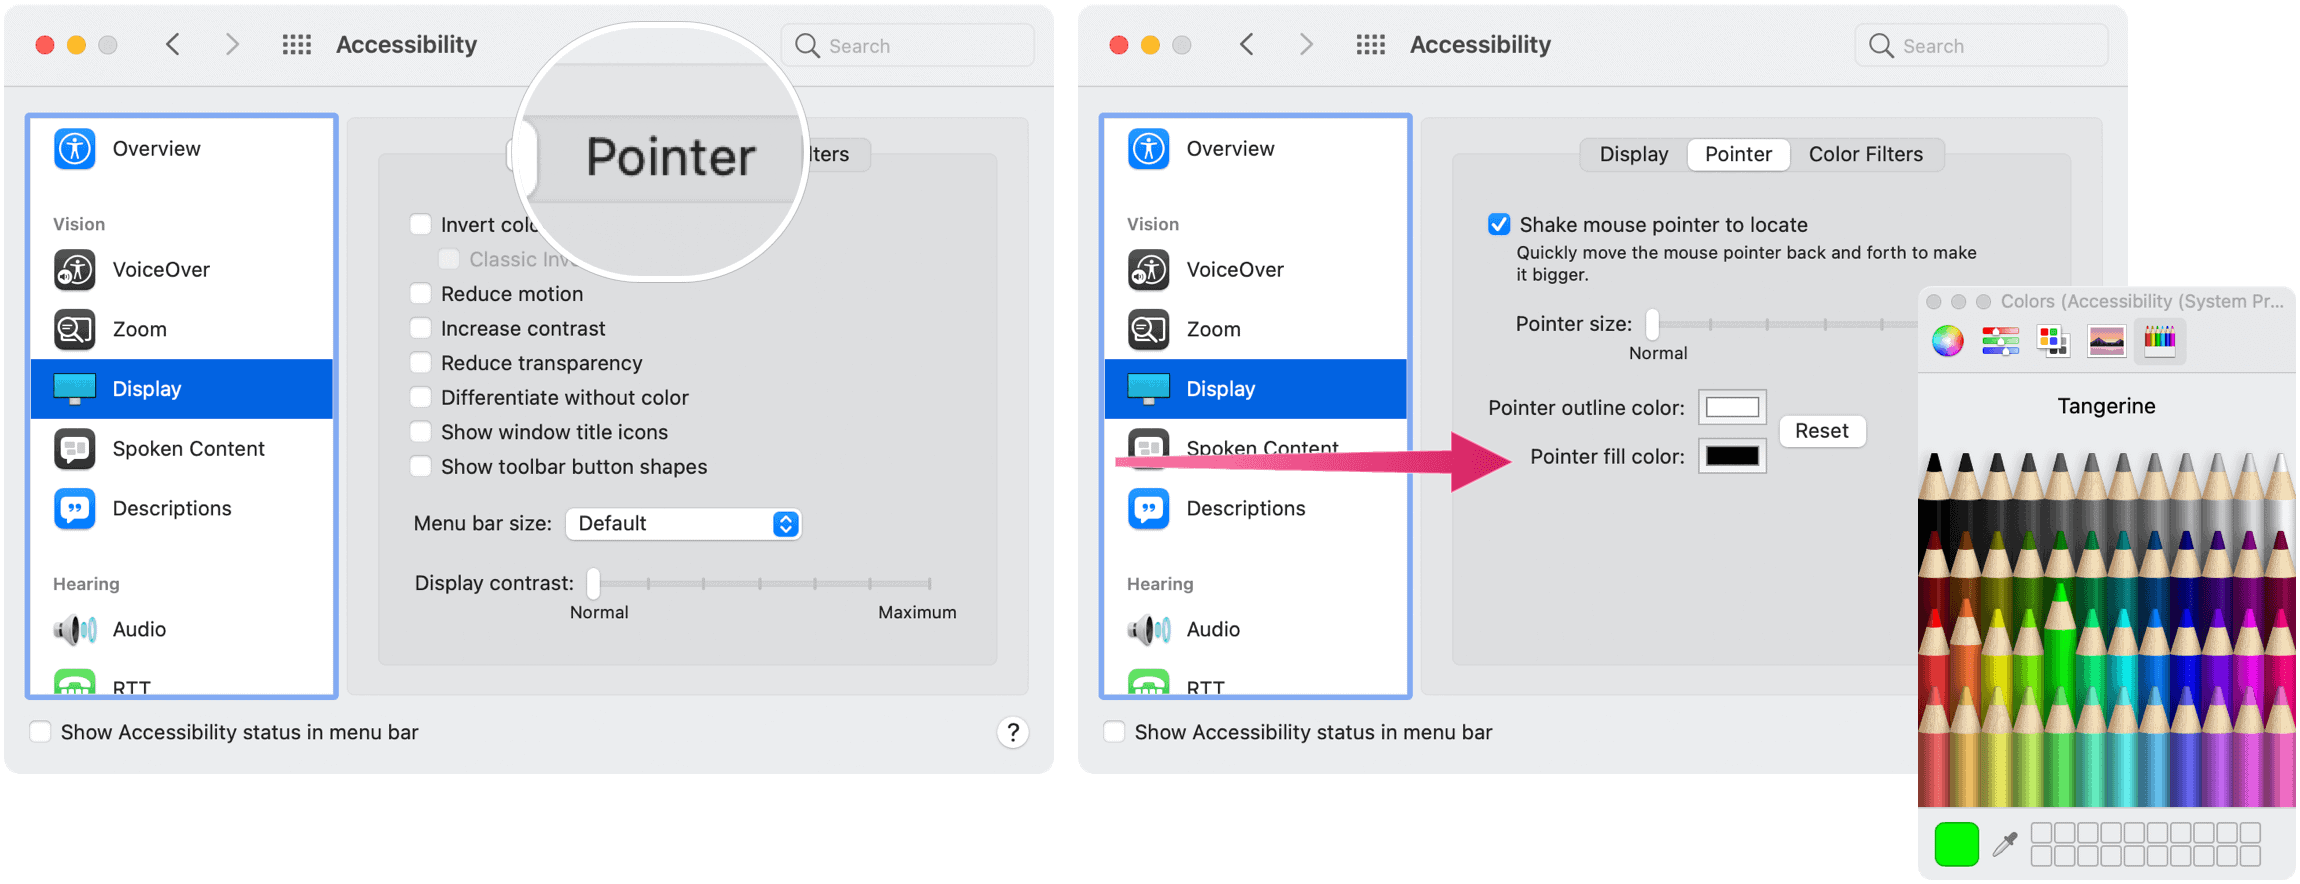
- Choose the Pointer tab on the right side of the accessibility box.
- Click Pointer Outline Color.
- Select a color from the pop-up box.
- Exit the box, which changes the pointer outline color.

Change the Cursor Pointer Fill Color
For further adjustment, you can change the pointer fill color in macOS Monterey:
- Click on the System Preferences icon in the Mac dock.
- Next, select Accessibility.
- Choose Display on the left side of the accessibility box.
Next:
- Choose the Pointer tab on the right side of the accessibility box.
- From there, click Pointer Fill Color.
- Select a color from the pop-up box.
- Exit the box, which changes the pointer fill color.
Cursor Color: Return to Default
At any time, you can return both the cursor outline and fill colors to the default settings:
- Click on the System Preferences icon in the Mac dock.
- Select Accessibility.
- Choose Display on the left side of the accessibility box.
Next:
- Choose the Pointer tab on the right side of the accessibility box.
- Click the Reset button.
Existing Accessibility Features for Cursor
As stated above, before macOS Monterey, Apple only offered two accessibility features for the cursor, locating the mouse pointer by shaking it and changing the cursor size.
The first solution works exactly as it sounds: quickly move your finger on the trackpad or quickly move the mouse to enlarge the pointer so you can find it temporarily.
The next solution involves going into familiar settings:
- Click on the System Preferences icon in the Mac dock.
- Select Accessibility.
- Choose Display on the left side of the accessibility box.
- Use the slider for Pointer Size to match your preferred style.
That’s it! Those are the new (and old) ways you can adjust the Mac cursor for accessibility. For additional Mac settings, check out how to customize and use the Control Center and how to mirror an iPhone or iPad to your Mac.