How to Fix Google Docs Unsupported Image Type

Having trouble with an unsupported image type in Google Docs? You can fix the problem by switching to another file type. Here’s how.
If Google Docs tells you that you’re using an unsupported image type, then you won’t be able to use it in your document. The only way around to get around an unsupported image type in Google Docs is to convert your image to another type of file (like PNG to JPG) or use a different image entirely.
If you want to keep using the same image, there are a few ways you can convert your image file type to one that Google Docs supports. I’ll explain how you can do this using the steps below.
Supported Image Types in Google Docs
Google Docs supports many common image types. These include:
- JPEG/JPG. Ideal for photos, this format is widely accepted and provides good quality with manageable file sizes.
- PNG. Provides support for transparency and is preferred for logos or images with transparent backgrounds.
- GIF. Best for simple animations or images with limited color palettes.
- BMP. A format that stores color data for each pixel in the image without any compression.
- SVG. A vector image format suitable for diagrams and logos, which can scale up or down without losing clarity.
Each of these formats is chosen for specific advantages, such as quality versus file size or the need for transparency. If you’re facing compatibility issues with images in Google Slides, checking the image format is a good first step. However, if you decide to try and use an unusual image file format that isn’t on this list, and you see the unsupported image type error, you’ll need to convert the image to another format (or switch images entirely).
Manually Change the File Extension of an Image
If you see the unsupported image type error in Google Docs, a simple workaround is to change the file extension of your image manually to a format Google Docs accepts, like .jpg, .png, or .gif.
There’s no guarantee this will work, especially if you’re using an unusual file format in the first place, but it’s worth trying in the first instance. If it doesn’t, however, you’ll need to try and convert the image to another format properly instead. To manually change an image’s file extension, follow these steps.
- Locate the image file on your computer in File Manager.
- Right-click on the file and select Rename.

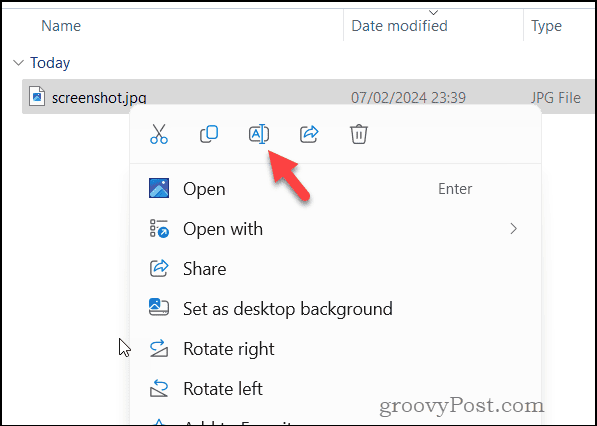
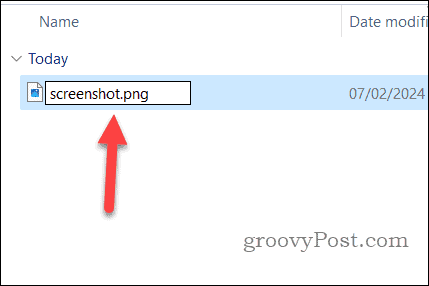
- Delete the current file extension (the part after the dot, such as .png).
- Type the new extension for the file format you want, using a widely supported format that Google Docs will recognize (such as .png or .jpg).
- Press Enter to save the change.

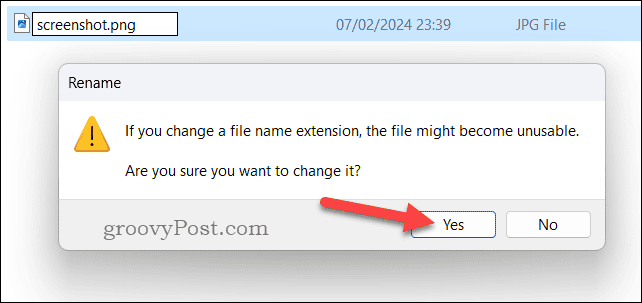
- Windows might warn you about changing the file extension—click Yes to confirm.

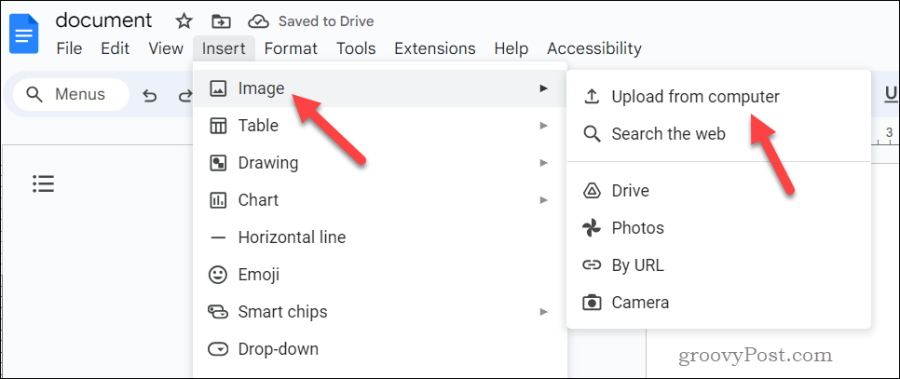
- Next, open Google Docs and try to insert an image by pressing Insert > Image > Upload from computer, making sure to select the image you renamed.

If your image still isn’t supported by Google Docs after changing the extension, you’ll need to use a proper image conversion tool to change the file format.
Convert an Image to Another File Type Using Adobe Express Online
When you’re dealing with unsupported image types in Google Docs, Adobe Express offers a convenient (and free) online tool to convert your images into compatible formats. While other tools exist for this online, Adobe is a reputable brand, so I feel comfortable recommending that you use it here.
You can use this tool to switch your image to a format that Google Docs recognize. To convert your image, follow these steps.
- Visit the Adobe Express website and sign in using your Adobe account details. The service is free, so sign up if you don’t already have an account.
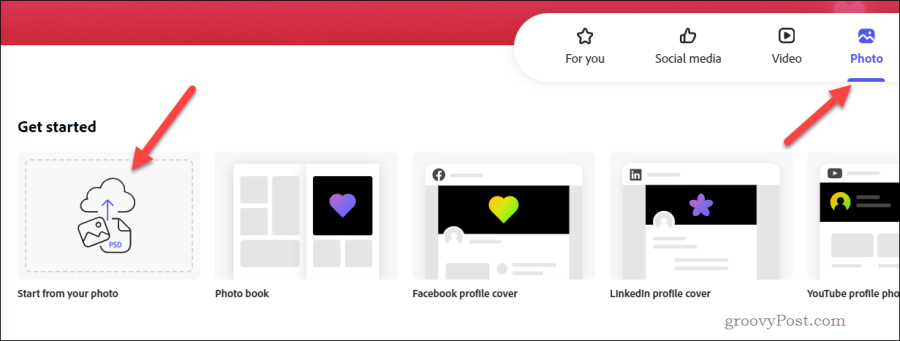
- Next, click Photo > Start from your photo, then select an image you want to convert.

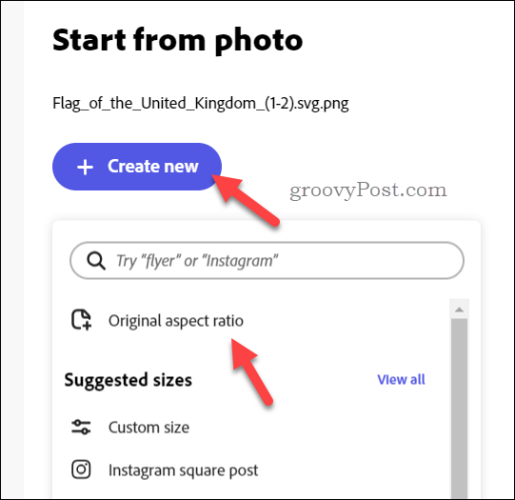
- In the pop-up window, click Create New > Original aspect ratio.

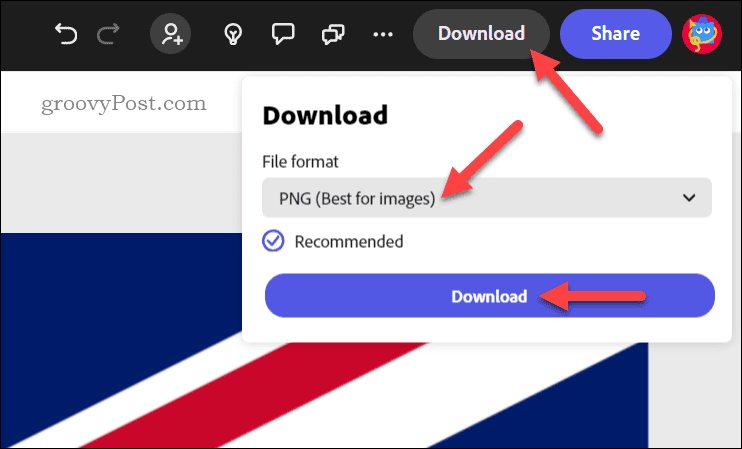
- Once inserted, press Download in the top-right corner.
- In the drop-down menu, select PNG or JPG from the File Format section.
- Press Download to download the new image in the converted format.

Adobe Express makes this easy, and it’s free to use. However, if you’d prefer, you can also use installed applications like Photoshop or GIMP to convert to other image formats instead.
Using the Right Images in Google Docs
Google Docs supports a wide range of images, but it’s probably a good idea to use only the most common formats like JPEG, PNG, or GIF for the best compatibility. If you decide to export your document outside of Google Docs, sticking to a common format will make it easier to use those images again later.
If Google Docs doesn’t support your image type, you won’t have a choice—you’ll need to follow the steps above to be able to use your image. Alternatively, choose a different image to use in your document.
Leave a Reply
Leave a Reply


