How to Take a Screenshot on a Mac
You can quickly take screenshots on a Mac by using some easy-to-use keyboard commands. Here’s how.
A screenshot allows you to take an immediate picture of the windows and icons visible on your PC or Mac screen. You can then share the image with others or save it for your own records. You may want to do this if you’re trying to troubleshoot a problem or if you want to show off an impressive in-game win, for instance.
If you’re a Mac user, screenshots are easy to take, with built-in options that allow you to create and save custom screenshot images in seconds. If you want to know how to take a screenshot on a Mac, you can follow this step-by-step guide.
1. How to Take a Screenshot on a Mac (Full Screen Method)
The fastest way to take a full-screen screenshot on a Mac is to use a keyboard command.
For example, you can take a screenshot of your full on-screen display (including all running apps, the Dock, the menu bar, and more) by pressing Shift + Command + 3 on your keyboard.

macOS will automatically save a screenshot of your desktop as a PNG file. The image will have a filename that includes the time and date the image was taken (eg. Screenshot 2022-01-25 at 21.33.18.png).
Once saved, you can then open or edit this image via the desktop or by using Finder.
2. Selecting a Custom Screenshot Area
If you want to customize the screenshot you’re taking, you can modify the area captured in a screenshot.
To do this, press Shift + Command + 4 on your keyboard. Your mouse cursor will change—you can then use this to select the area you want to screenshot.

Use your mouse or trackpad to select the area you want to screenshot. When you release the cursor, the screenshot will save in the usual place on your desktop.
3. Use the Screenshot Pop Up Menu Bar
Another easy method to take screenshots on a Mac is to use the screenshots pop-up menu bar. This appears at the bottom of your screen when you press the Shift + Command + 5 keyboard combination. It’ll also appear if you select the screenshot icon on the touch bar on certain MacBooks.
Once you’ve activated the pop-up, you’ll see various options to determine how you want the screenshot to appear. these include the ability to capture the entire screen, a visible window, or to select an area using your mouse or trackpad.
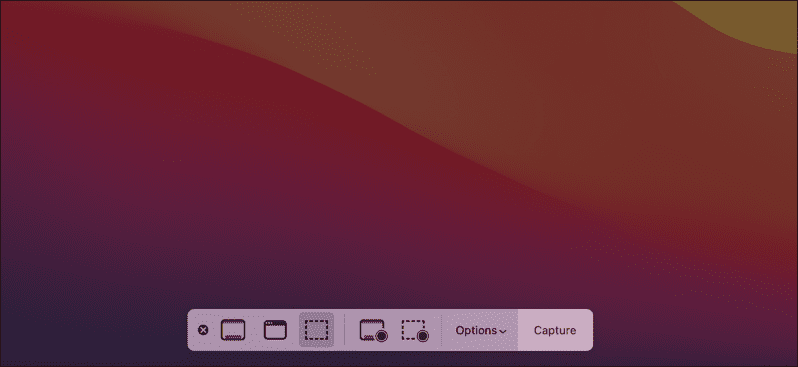
To do this, select one of the options on the bar, then press or drag the screenshot accordingly. For instance, if you select to capture a visible window, select the Capture Selected Window option, then select the window using your mouse.
You can also use this area to capture your actions on-screen as screen recordings. These records are saved as videos on your desktop, although screen recordings made this way will lack any internal audio.
If you wish to abandon your screenshot or screen recording, you can press the cancel (X) icon on the left-hand side of the menu bar.
How to Change Where Screenshots Are Saved on a Mac
By default, macOS will automatically save your screenshots to your desktop. If you want to change where your screenshots are saved, however, you can do this using the screenshot pop-up menu bar.
First, press Shift + Command + 5 to load the bar. Once the bar appears at the bottom of your screen, select Options.
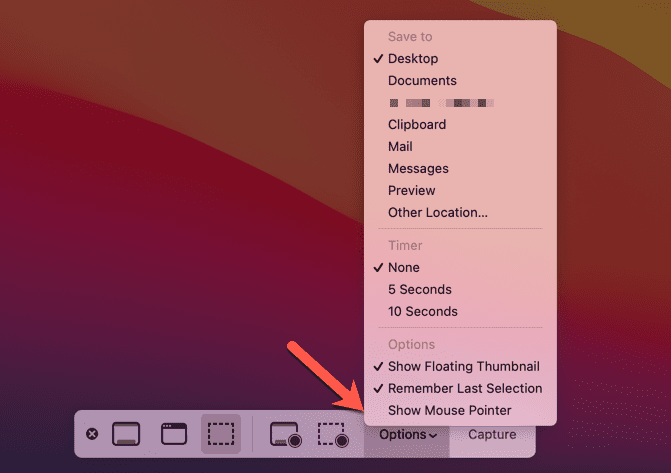
At the top, select another preset location to save your screenshots (eg. Documents), or choose Other Location to choose your own. If you press Other Location, you’ll need to choose a new folder for your screenshots using the pop-up Finder window.
Quickly Taking Screenshots on a Mac
Whether you’re using built-in tools or a third-party app like SnagIt, you can quickly and easily take screenshots on a Mac using the steps or tools we’ve outlined above.
You shouldn’t have any problems using the built-in methods but, if you need more features, switching to a third-party alternative probably isn’t a bad idea. You can then think about cropping your screenshots but, if you need to make more extensive changes, you’ll probably need to use an image editing tool like GIMP or Photoshop instead.