How to Print Double-Sided on Mac
If you’re printing a long document, using both sides of the paper requires far fewer sheets. Here’s how to print double-sided on Mac.
It’s fair to say that the invention of the printing press changed the world. The first printing press could produce up to 3,600 pages a day, a huge increase over the previous practice of hand-printing, which could only produce around 40.
Nowadays, I can print 3,600 pages from my fairly cheap consumer-level printer in around six hours. If I’m going to print that much, however, I’m going to go through a lot of paper. Thankfully, there is a way to reduce the amount of paper I need in half: double-sided printing. By printing on both sides of the paper, printing 3,600 pages only requires 1,800 sheets of paper. It’s unlikely that you’re printing quite that many pages, but double-sided printing can still save you a lot of paper in the long run. Here’s how to print double-sided on Mac.
How to Print Double-Sided from Apple Apps
If you’re using stock Apple apps, such as Pages, Safari, or Preview, you can turn on double-sided printing by choosing the appropriate Double-sided setting in the Print options dialog.
- Open a document you want to print in an Apple app such as Pages or Safari.
- Click the File menu.


- Select Print.


- Alternatively, use the keyboard shortcut Cmd+P.
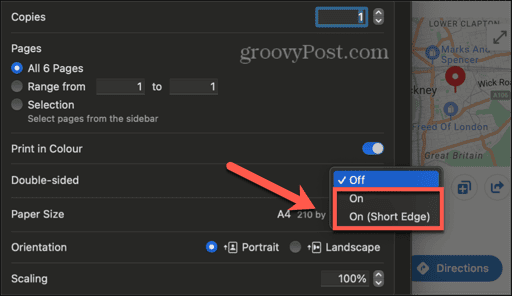
- In the print options, click the Double-sided drop-down.

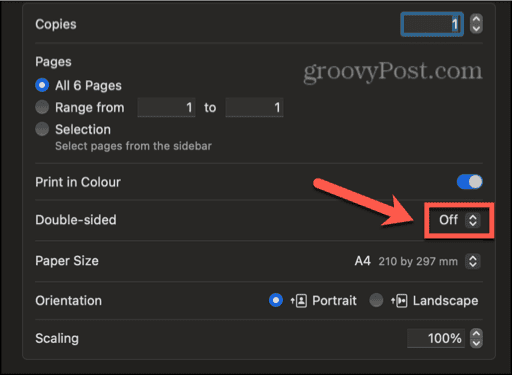
- Select On or On (Short Edge).

- Change any other print settings you want to change and click Print.

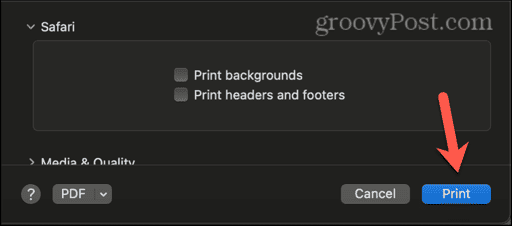
- Your document will now print double-sided on a compatible printer.
How to Print Double-Sided from Microsoft Office Apps on Mac
If you’re printing from Microsoft Office apps such as Word, Excel, or PowerPoint, the print options look a little different. Once again, you can print double-sided by choosing the appropriate Double-sided setting in the Print options dialog.
- Open the Microsoft Office document that you want to print.
- Click the File menu.


- Choose Print.


- Alternatively, press Cmd+P.
- Underneath the Copies & Pages options you’ll find the Double-sided options; you may need to scroll down to see this setting.

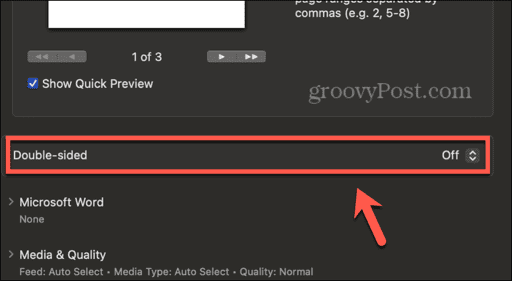
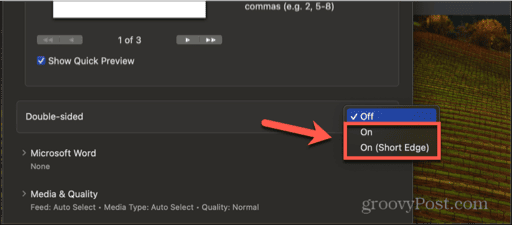
- Click the Double-sided drop-down and select On or On (Short Edge).

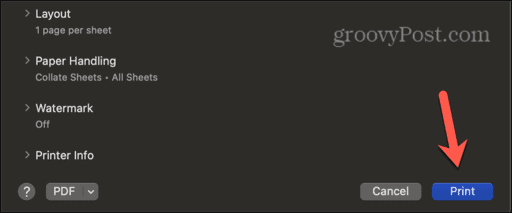
- Select any other print settings you wish and click Print.

- Your Microsoft Office document will print double-sided on a suitable printer.
How to Print Double-Sided from Chrome on Mac
If you’re printing from Safari, you can follow the instructions above for printing double-sided from Apple apps. However, if you’re printing from Chrome, the instructions for printing double-sided are a little different.
- Open the page you want to print in Chrome.
- Click the File menu.


- Select Print.


- Alternatively, use the keyboard shortcut Cmd+P.
- Click the arrow next to More Settings.

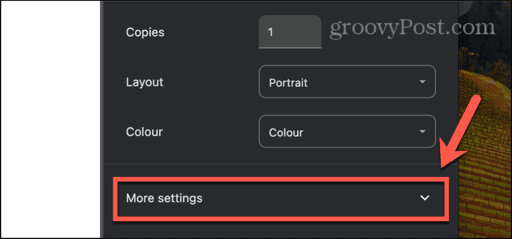
- Scroll down and check Print on Both Sides.

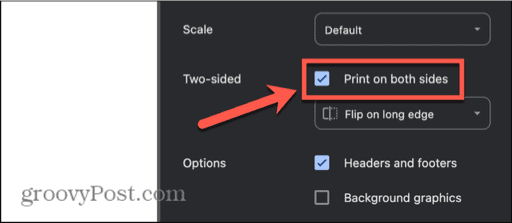
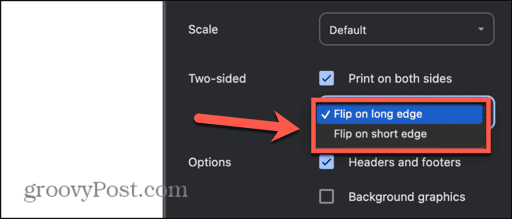
- Select Flip on Long Edge or Flip on Short Edge.

- Select any other settings you want and click Print.

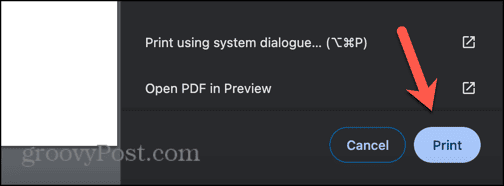
- Chrome will now print double-sided to a compatible printer.
How to Manually Print Double-Sided on Mac
If you don’t have a printer capable of printing double-sided, it’s still possible to print of both sides of the paper. You’ll need to do this manually, however, by printing on one side, then placing the same sheet back in the printer in the correct orientation and printing the next page. This method is useful for short documents, but if you’re printing a long document in this manner, it can become a time-consuming process.
- Open the document that you want to print double-sided.
- Print the page with the standard settings.
- Once the sheet has printed, place it back in the printer.
- You’ll need to orient the sheet such that the blank side is the side that will be printed on. This orientation will differ from printer to printer; there’s usually an image in the printer tray that indicates whether the printing will appear on the face-up side or the face-down side.
- Print the second page, and it should appear on the reverse of your sheet, leaving you with a double-sided page.
- If the page comes out upside down or prints on the already printed side, repeat the process, but try a different orientation when replacing the sheet in the printer.
Why Can’t I Print Double-Sided on Mac?
You can only print double-sided on Mac if your printer supports duplex printing. Many modern printers are capable of printing on both sides of the paper, but some printers don’t offer this feature.
If you don’t see any options for double-sided printing, or they’re grayed out, then it’s likely that your printer doesn’t support duplex printing. You can try using an alternative printer if you have one, or use the manual method detailed above.
What’s the Difference Between Long Edge and Short Edge Duplex Printing?

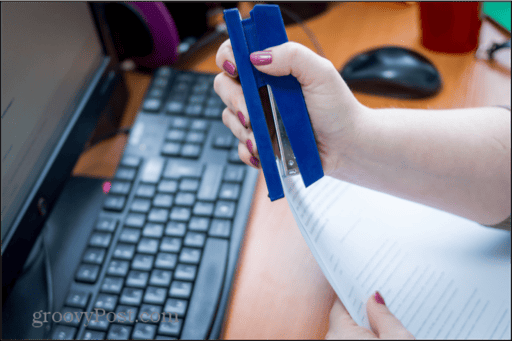
When you’re printing double-sided on Mac, you’re given two options. Long edge printing is the default option; if you set the Double-sided option on, it will use long edge duplex printing by default. You can also opt to use short edge duplex printing, too.
As the names suggest, the difference between the two options relate to the longer and shorter edges of the paper. Using long edge duplex printing for a portrait document, the second side is printed in the same orientation as the first. This means that when you bind your document along the long edge, the text is always the correct orientation to read. When you turn a page, the second side is the same way up as the first, which is what you want if you’re creating a book or a booklet.
Using short edge printing for a portrait document, the second page is printed upside down in comparison to the first. This means that when you bind the document along the short edge, when you flip a page up, the second page is in the correct orientation to read.
If you’re printing a landscape document, the orientation is reversed; for long edge printing, the second side will be upside down in comparison the first, and in short edge printing, the orientation will be the same.
Thankfully, your printer will take care of all of this for you. All you need to do is select the correct option for how you intend to bind your document and choose either landscape or portrait orientation, and the printer will figure out the rest. If in doubt, use long edge binding and print off a couple of test pages to make sure the document comes out as you expected.
Printing Duplex on a Mac
As you can see, printing double-sided on a Mac isn’t as simple as you might expect. That’s because different apps have different print options, so the exact method will change depending on which app you’re printing from. As a general rule of thumb, however, you’re looking for a setting such as Double-sided or Two-sided. If you can’t see these options, or they’re grayed out, you may not have a compatible printer.
Leave a Reply
Leave a Reply


